| Overview The Thunder & Lightning Animation that I developed a few years ago has become very popular. You can see the original web page here: http://www.trainelectronics.com/Animation-thunder-lightning/ I have had a number of requests for modifications from YouTube viewers and folks who have built up the circuit. This web page and associated video show the updates that I have made to the circuit and software. The goals of the update are:
|
|
For the basic Thunder & Lightning effect
you can ignore Trig2, LED1, LED2, Relay 1 and Relay 2. If you
want some animation to be activated for the duration of the sound
Relay 1 and LED 1 can be used.
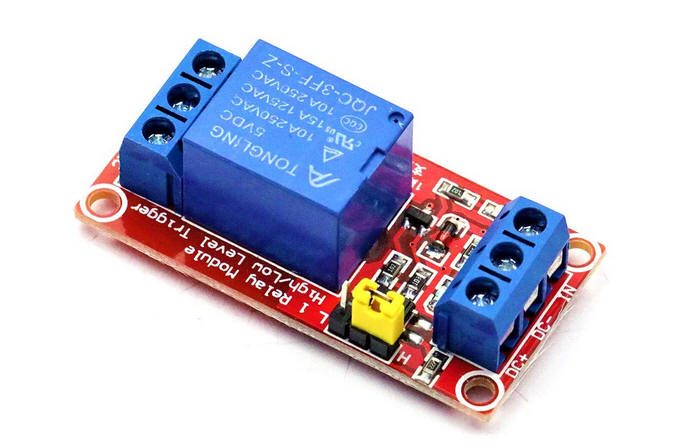
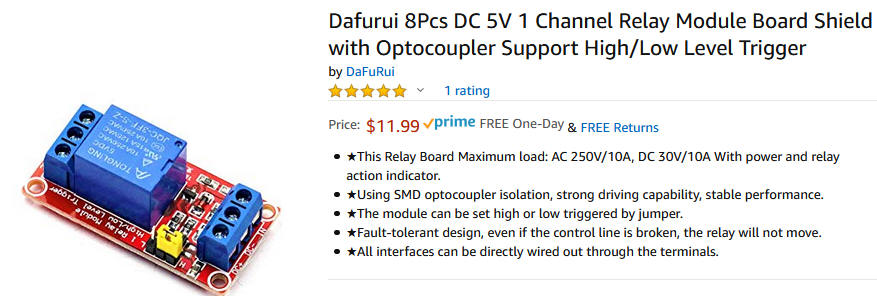
Rather than putting a relay and the associated circuitry on the circuit board I opted to use an inexpensive 5 volt relay module. This device connects to 5 volts, ground and an output pin on the Arduino. The small yellow jumper allows you to decide if the relay triggers when the input pin goes high or low. There are other 5 volt relay modules without this option but I find it very convenient should I need to change the status of how the relay operates.
Available at Amazon here:https://www.amazon.com/s?k=Dafurui+8Pcs+DC+5V+1+Channel+Relay&i=industrial&ref=nb_sb_noss
|
Parts
|
///LOCATION: D:\shared_stuff\Dropbox\Arduino\ThunderLightning-Relay-smoke-test\lightening-thunder-mp3-LEDs-V1-3--FromWebPage--NEW_Board2 /*
REVISED for new circuit board - 10-21-2019
d. bodnar - 9-06-2016
Lightning & thunder for CHP castle
*/
#include <DFPlayer_Mini_Mp3.h>
const int s1 = A3; // directly trigger file #1 - not yet implemented
const int s5 = A2; // directly trigger file #5 - not yet implemented
const int buttonPin = 3; // TRIG 1 the number of the pushbutton pin
const int buttonPin2 = 9; // TRIG 2 Switch #2 on new board
const int buttonState2 = 0;
int buttonState = 0; // variable for reading the pushbutton status
int buusyPin = 10;// buusyPin = 10; // sound player busy --- NOT DONE ON BOARD!!!!!!!!!!!!!!!!!!
int bsy = 0;
int LEDstripLight = 12; // WAS 13 IRL520 to LED strip light
int spare1 = 7; // spare input #1
int spare2 = 6; // spare input #2
const int relay1 = 13; // relay connection #1
const int relay2 = 11; // relay connection #2
int sensorPin = A0; // Audio level samples
int sensorValue = 0; // variable to store the value coming from the sensor
int buttn = 0;
int buttn2 = 0;
//***************************************SETUP*************************************
void setup () {
pinMode(buttonPin, INPUT);
pinMode(LEDstripLight, OUTPUT);
pinMode(buusyPin, INPUT);
pinMode(buttonPin, INPUT);
pinMode(relay1, OUTPUT);
pinMode(relay2, OUTPUT);
digitalWrite(relay1, LOW);
Serial.begin (9600);
mp3_set_serial (Serial); //set Serial for DFPlayer-mini mp3 module
mp3_set_volume (30); // must remove mp3_reset(); to get this to work
Serial.println("From Web Page");
}
//.......................................LOOP................................................
void loop () {
Serial.println("");
Serial.println("Waiting for Button Push");
do {
buttn = digitalRead(buttonPin); // pins closest to power pins
buttn2 = digitalRead(buttonPin2); //
Serial.println(buttn2);
// if (buttn2 == 0) {
// digitalWrite(relay1, HIGH);
// }
// else {
// digitalWrite(relay1, LOW);
// }
} while (buttn == 0);
Serial.println("Button Hit");
digitalWrite(relay1, HIGH);
mp3_play(1);
delay(100);
do {
sensorValue = analogRead(sensorPin);
Serial.print(sensorValue);
Serial.print(" ");
if (sensorValue >= 750) {
Serial.println("large number! ");
digitalWrite(LEDstripLight, HIGH);
}
if (sensorValue <= 666) {
digitalWrite(LEDstripLight, LOW);
}
bsy = digitalRead(buusyPin);
} while (bsy == 0); // zero when sound active
digitalWrite(relay1, LOW);
}
//...................................... END LOOP ........................................
|