| Introduction I have used any number of different methods of animation when building model railroads including movement, sound and light. I have not, however, used smoke... that is until now. The fairly recent advent of smokeless cigarettes, also called e-cigarettes, e-cigs or vapor cigarettes, has provided an opportunity for us to make small, inexpensive and quite impressive smoke machines. I have been doing some experiments and have come up with a fairly simple method to create a good bit of smoke that can be turned on or off at will. The smoke maker shown here is appropriate for creating smoking pumpkins on Halloween, getting a chimney to smoke on a Christmas diorama or to provide realistic smoke stack smoke from a factory on a model railroad. It could also be used to have smoke emanate from a burning building, car or airplane crash or a campfire. To turn an e-cigarette into a stand-alone smoke maker you need to identify and purchase a number of items including an e-cigarette (or its heating element) a non-offensive smoke liquid, a small air pump to move the smoke from the heating element to the animation site and an appropriate power supply.
|
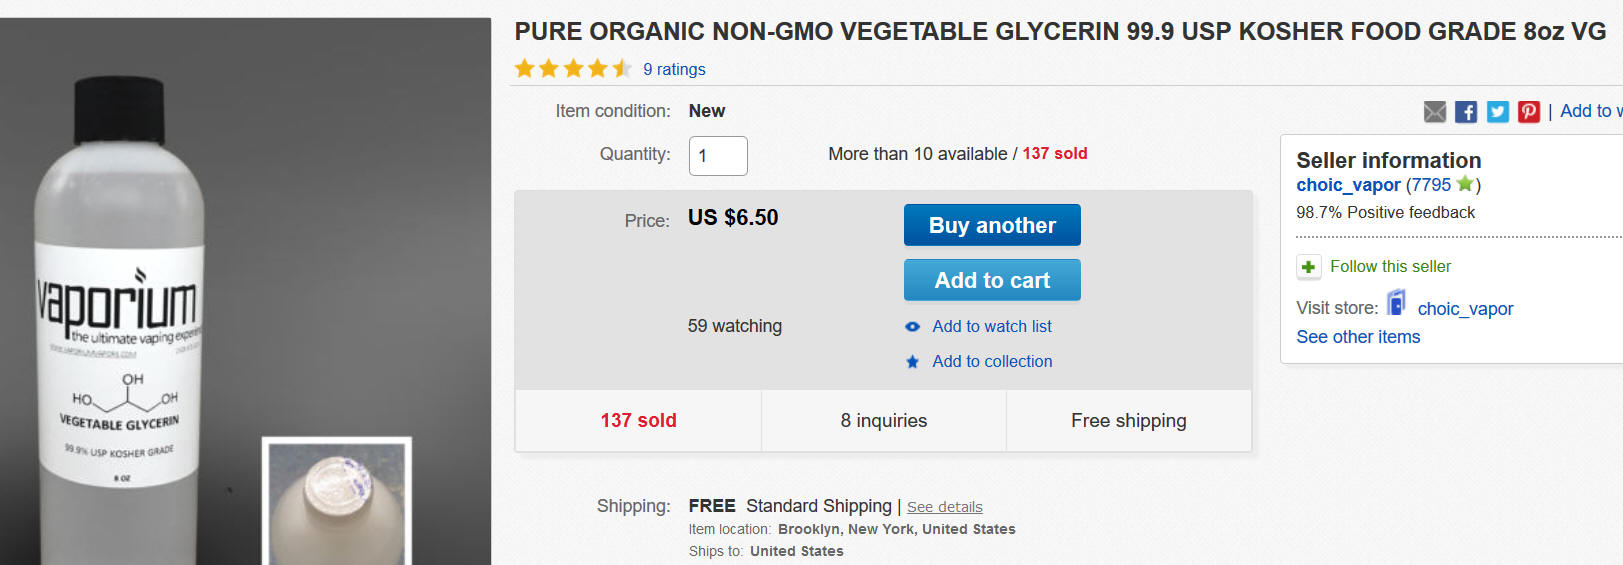
| Vapor Liquid While you can use standard vapor liquid that is designed for e-cigarettes for this project it is not recommended as most of it contains two things that we don't need: nicotine and flavoring. Most vape shops either have or can mix up the liquid without flavoring or nicotine. It can also be purchased in this form from eBay. Better yet, you can use pure food-grade glycerin which is used as the base for most e-cigarette liquid. It is available from eBay and other sources at a very reasonable cost.
|
| Safety The vapor emitted from e-cigarettes, including the one shown here, can set off smoke detectors. While such occurrences seem to be infrequent please use care when using the smoke generator in public buildings. The e-cigarette has a heating element that vaporizes the liquid. These are designed to be heated by 3.7 volt lithium batteries and this voltage should not be exceeded. Don't be tempted to use 5 or more volts as you are likely to destroy the heating element and/or start a fire. |
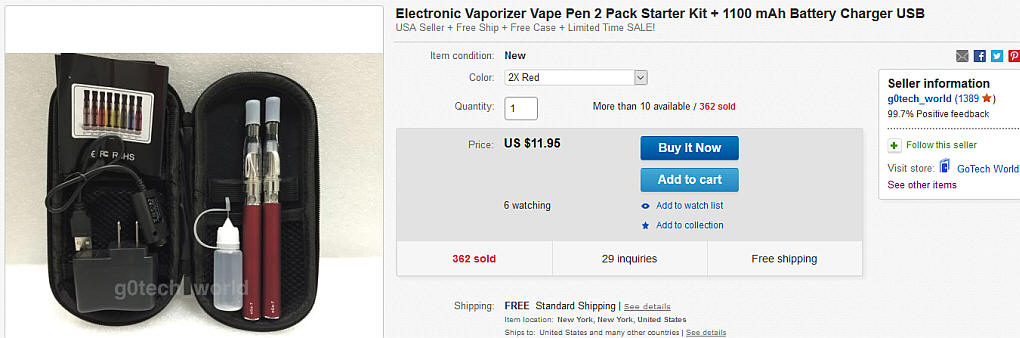
| Choosing an E-Cigarette I started out using a very inexpensive e-cigarette that I purchased on eBay. The unit shown here included two cigarettes, batteries and a charger.
The only part of the unit that I used was the vaporizer (the top of the cigarette) and the battery connector. If you solder two wires onto the vaporizer you don't even need the battery connector. |
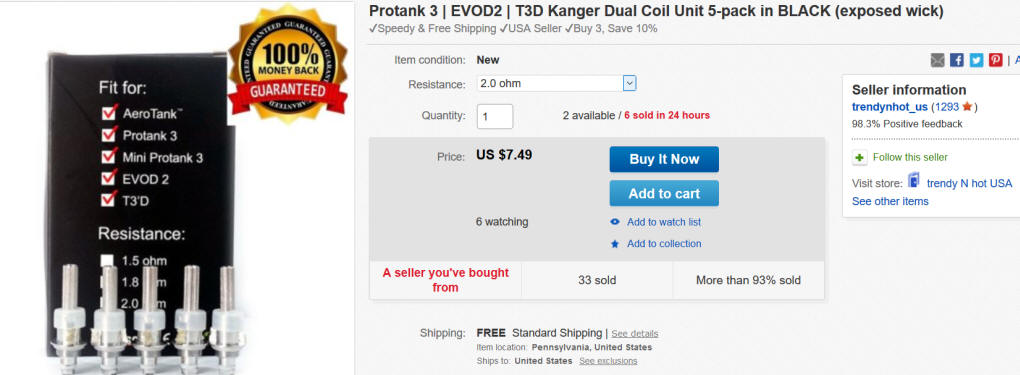
| Since I have been disassembling the
e-cigarettes to harvest the heating element I spent some time
searching eBay for a seller that might be selling just that
component. Luckily I found such a vendor and
purchased 5 heating elements (shown here) for
less than $8 delivered. They
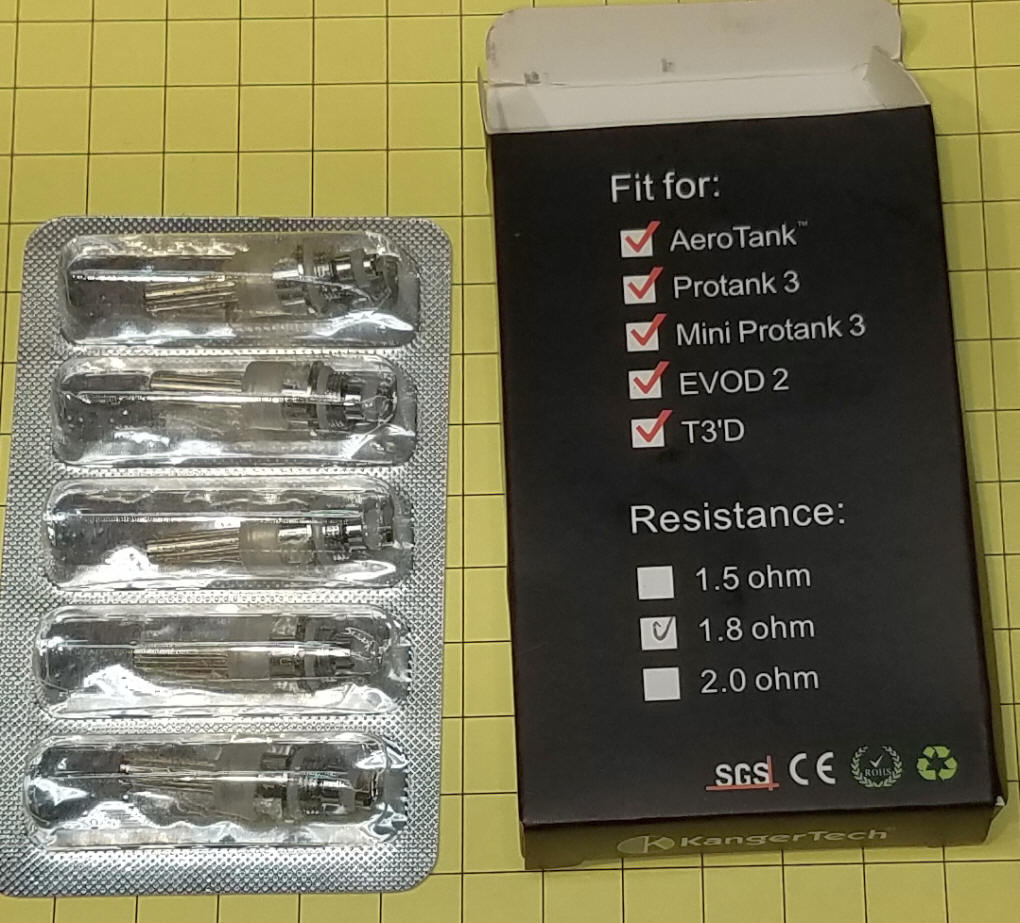
are available in several types with varying resistance. I
chose 1.8 ohms but the others should work well, too.
The heating elements come nicely packaged in individual compartments.
|
Heater Availability (as of 1-2-2021) https://www.rockbottomvapes.com/kanger-dual-coil-heads-v2-5-pack/ |
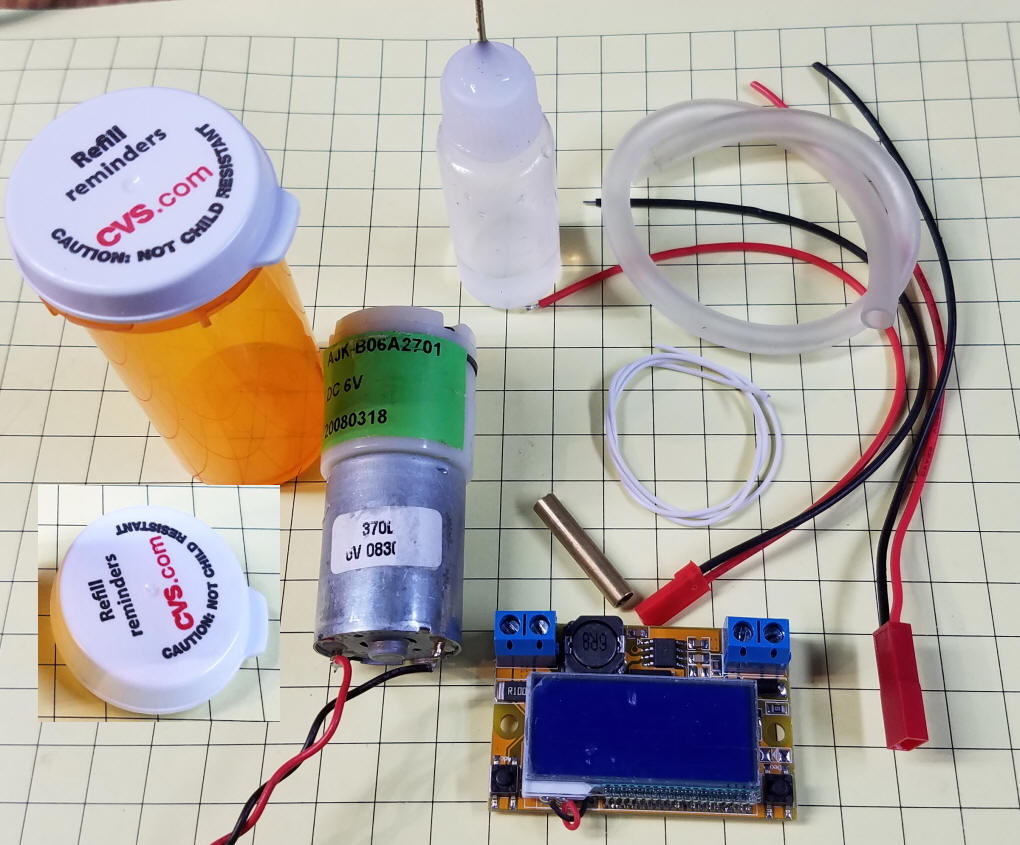
| Materials In addition to the heating element you will need the following parts:
|
|
|
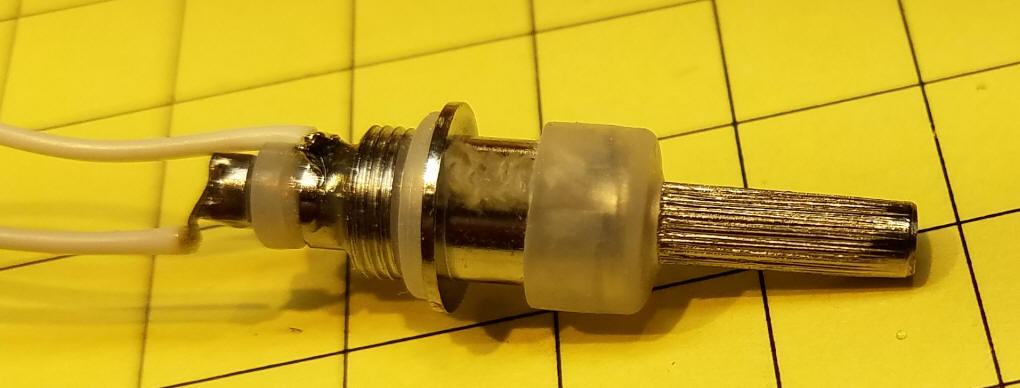
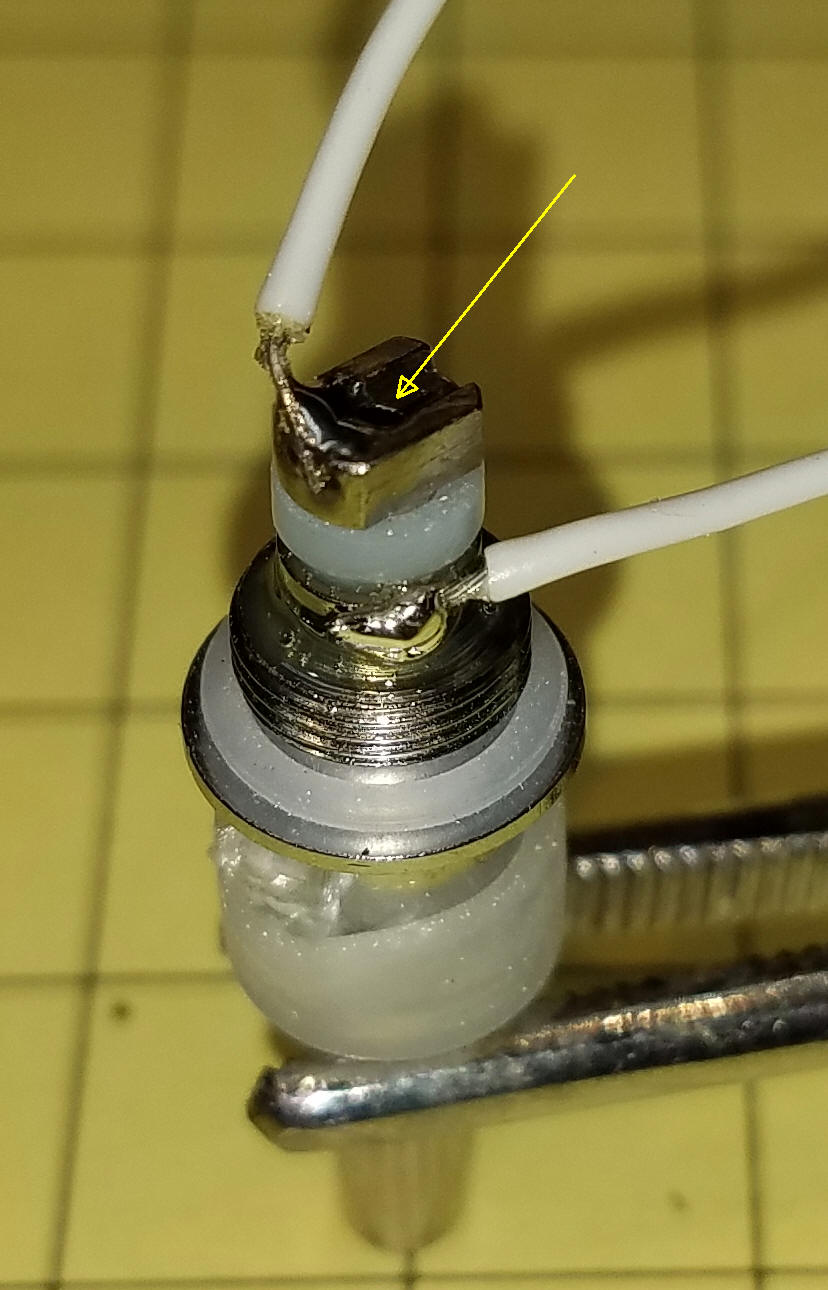
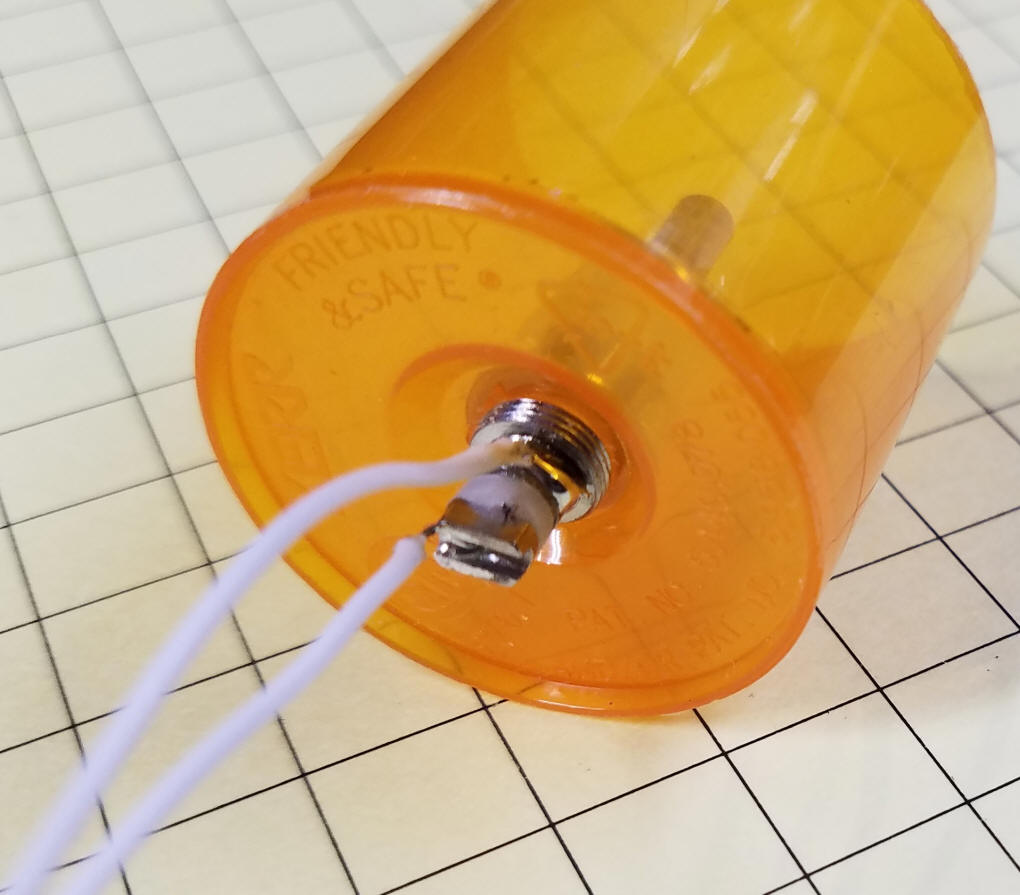
| Soldering to the Heating Element Two wires need to be soldered to the end of the heating element. I used thin (26 or 28 gauge or so) stranded wire. One wire goes to the body of the unit and the other to the central portion of it. Make sure the soldered wires don't extend beyond the diameter of the threaded part of the base or you may not be able to get the unit installed in the smoke maker. Also take note that there is a small white O ring just above the threads. Make sure it doesn't get lost.
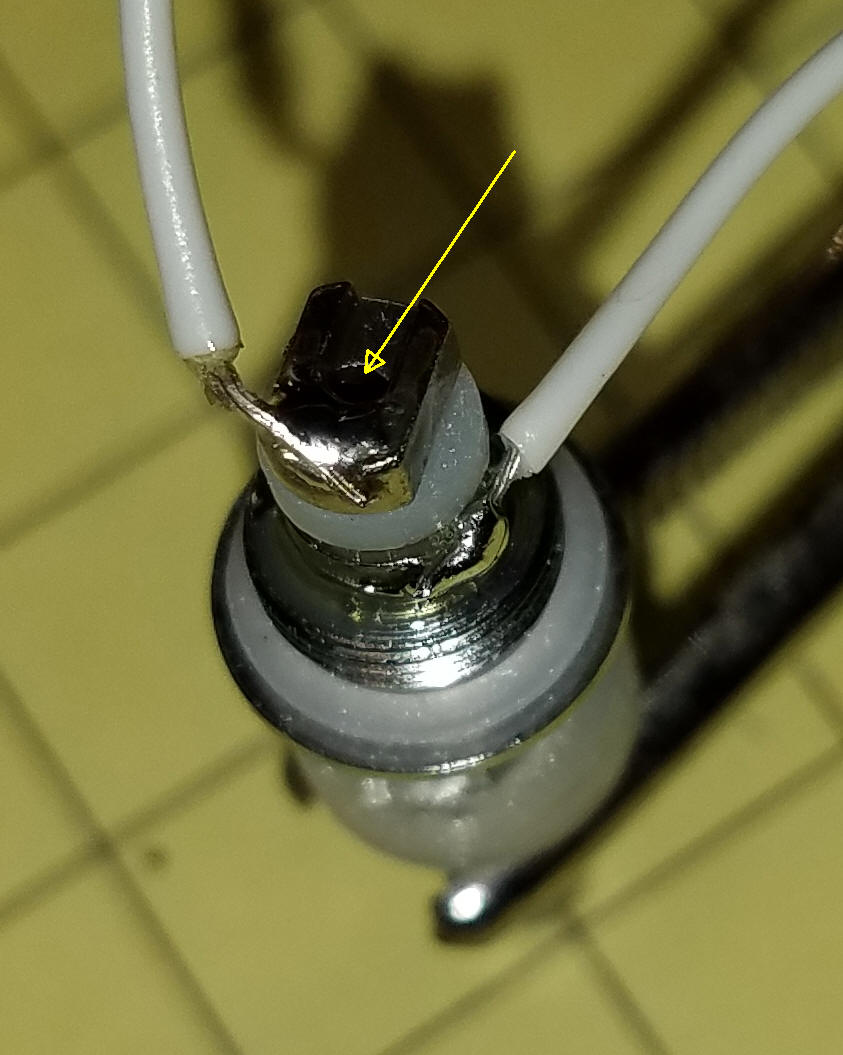
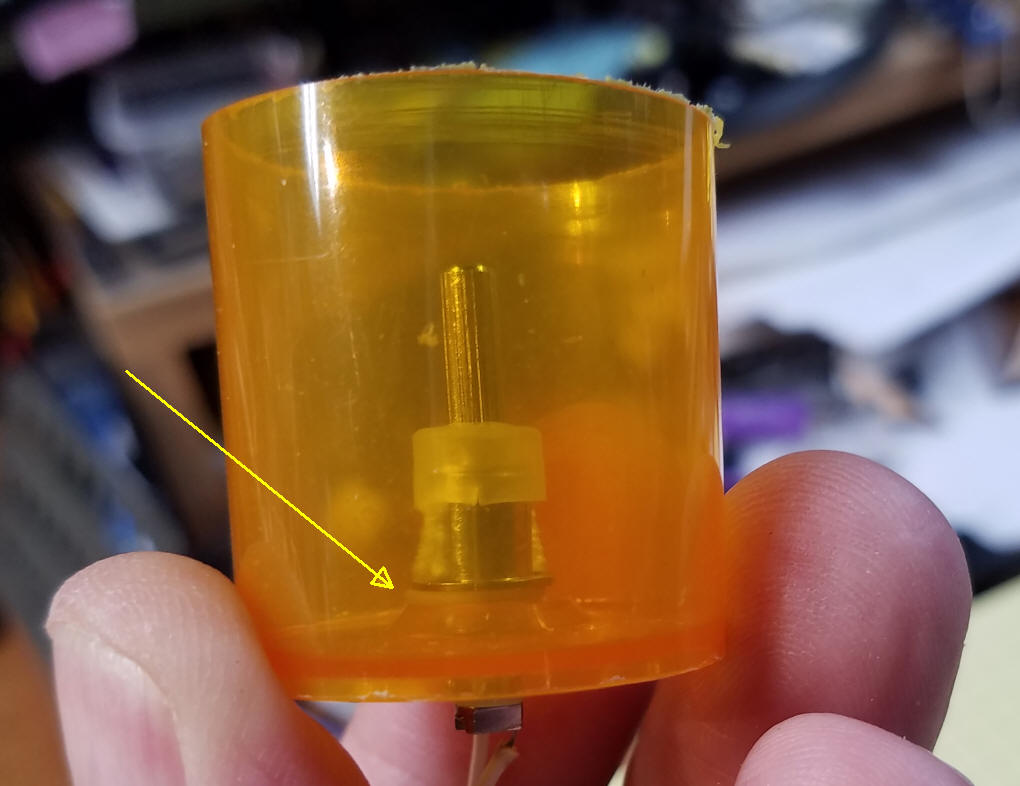
Be very careful not to plug up the hole that is in the middle of the central shaft. That hole is how air gets to the heating element. The hole is shown by the arrow in the photos below.
I used a hot soldering iron (set to about 525 degrees F) and good quality solder. Fortunately the white insulating material seems to be quite heat resistant and I did not see any damage to it after soldering.
|
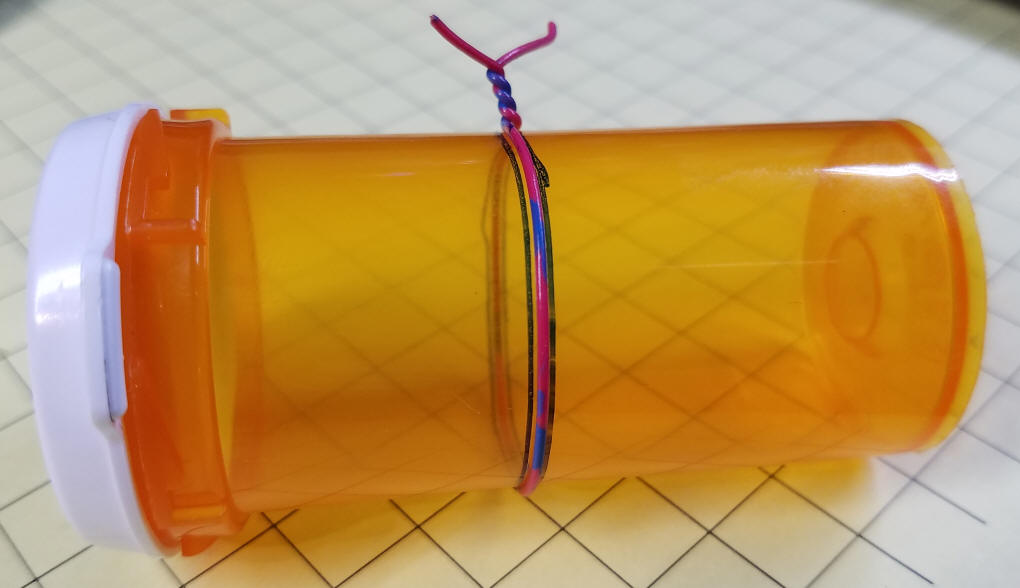
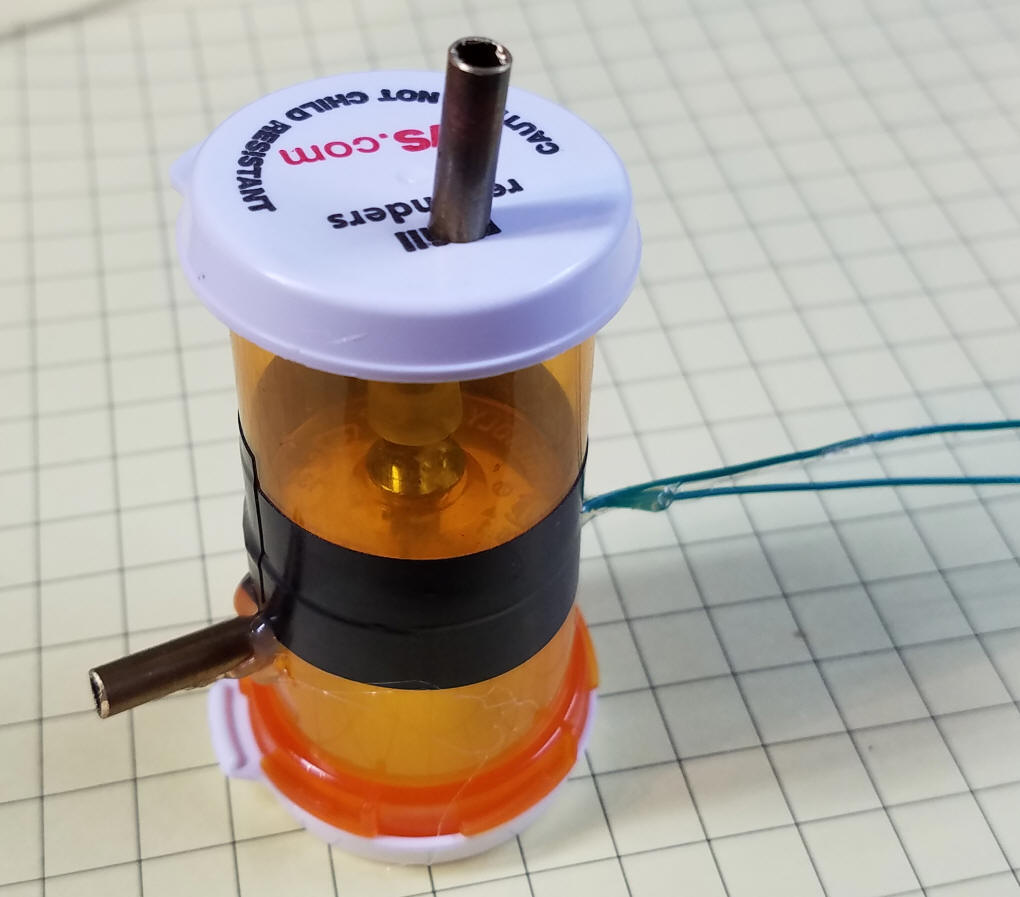
| Preparing the pill bottle First cut the pill bottle in half being careful to keep the cut even and parallel to the top of the bottle. I used a piece of wire wrapped around the bottle to help mark the cut line.
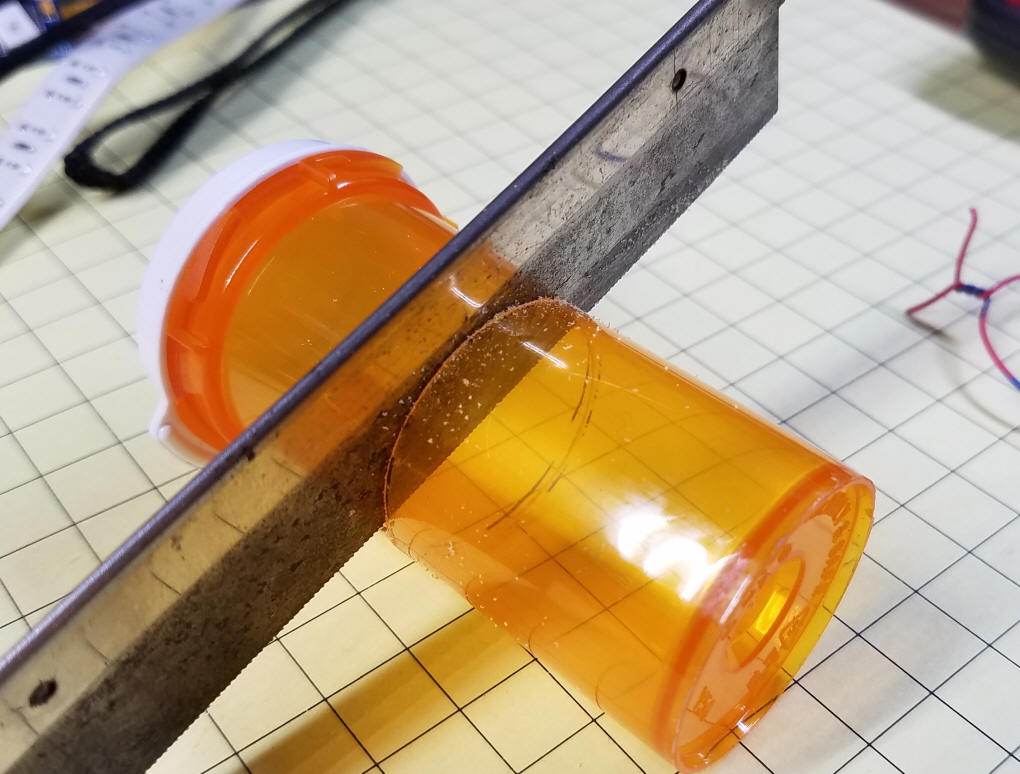
Cut the pill bottle in half using a fine tooth saw.
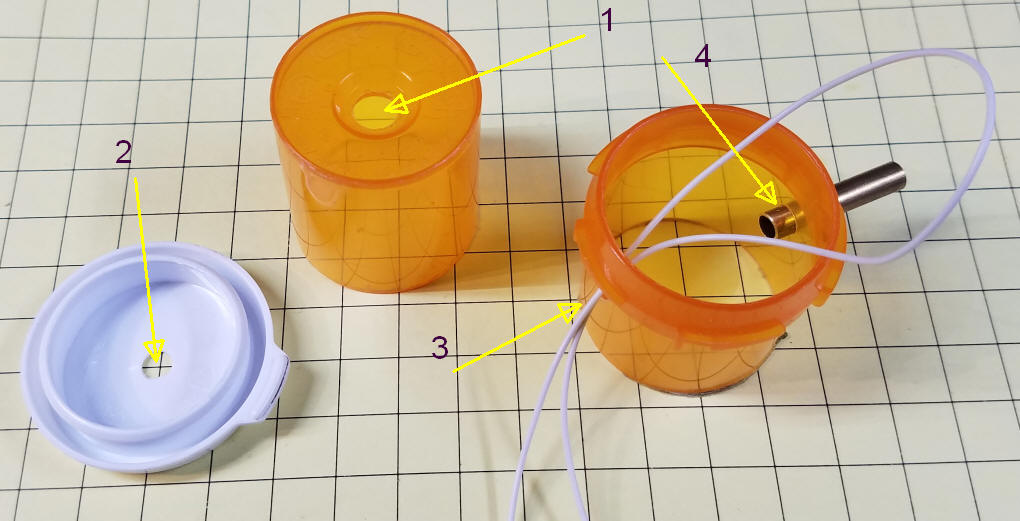
Once it is cut drill a 17/64" hole in the bottom of the bottom piece of the bottle (#1). Drill a 3/16" hole in the white cap (#2). Drill another 3/16" hole in the side of the top piece (#4) and a 1/8" hole in the top piece opposite the 3/16" hole (#3). Hole #1 is for the base of the heating element, #2 is where the smoke comes out, #3 is for the wires that supply power to the heating element and #4 is where the air pump connects. In this photo hole #2 is in the center of the cap. I found that putting it off center helps to return any condensed smoke fluid to the reservoir while having it in the center can put too much fluid back on the heating element.
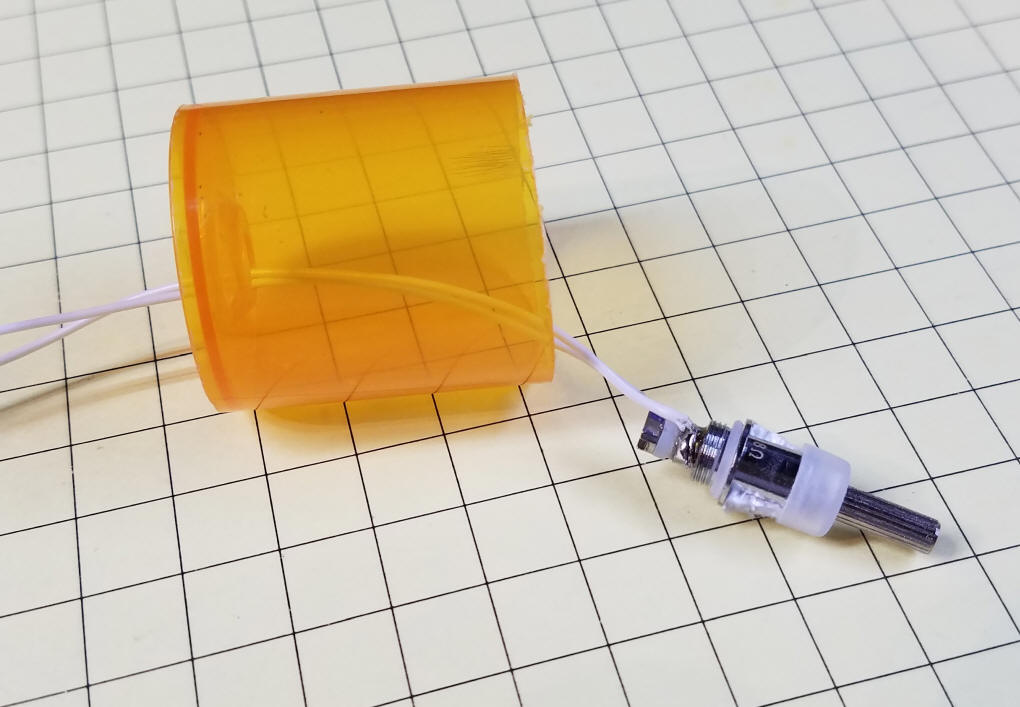
Press and twist the heating element into the hole being careful to keep it vertical and to evenly compress the white O ring.
The O ring is seen here.
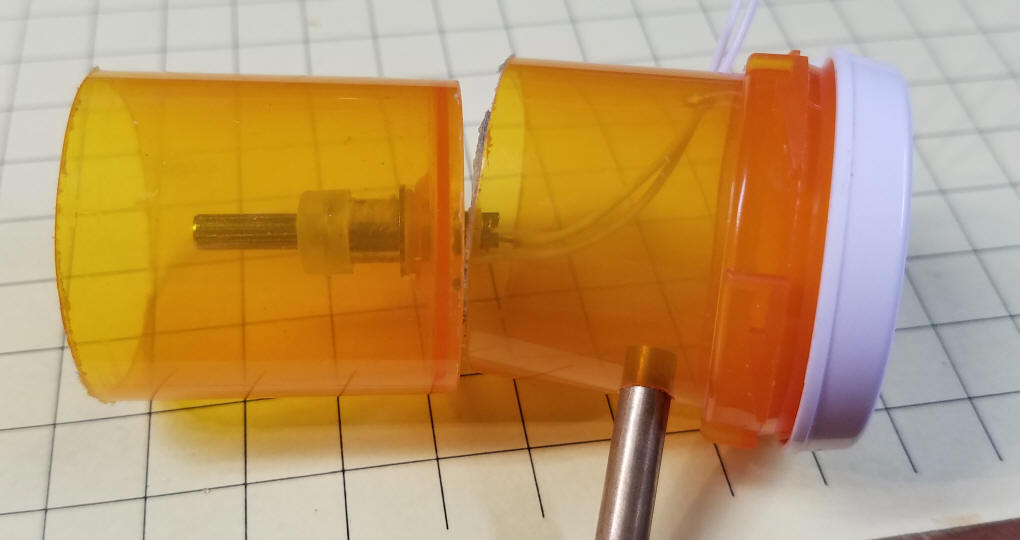
The bottle goes back together like this with the part cut from the bottom at the left and the top, with the second, undrilled cap, to the right.
All that remains is to seal the white wire and brass tube. I used hot glue but other adhesives will work, too.
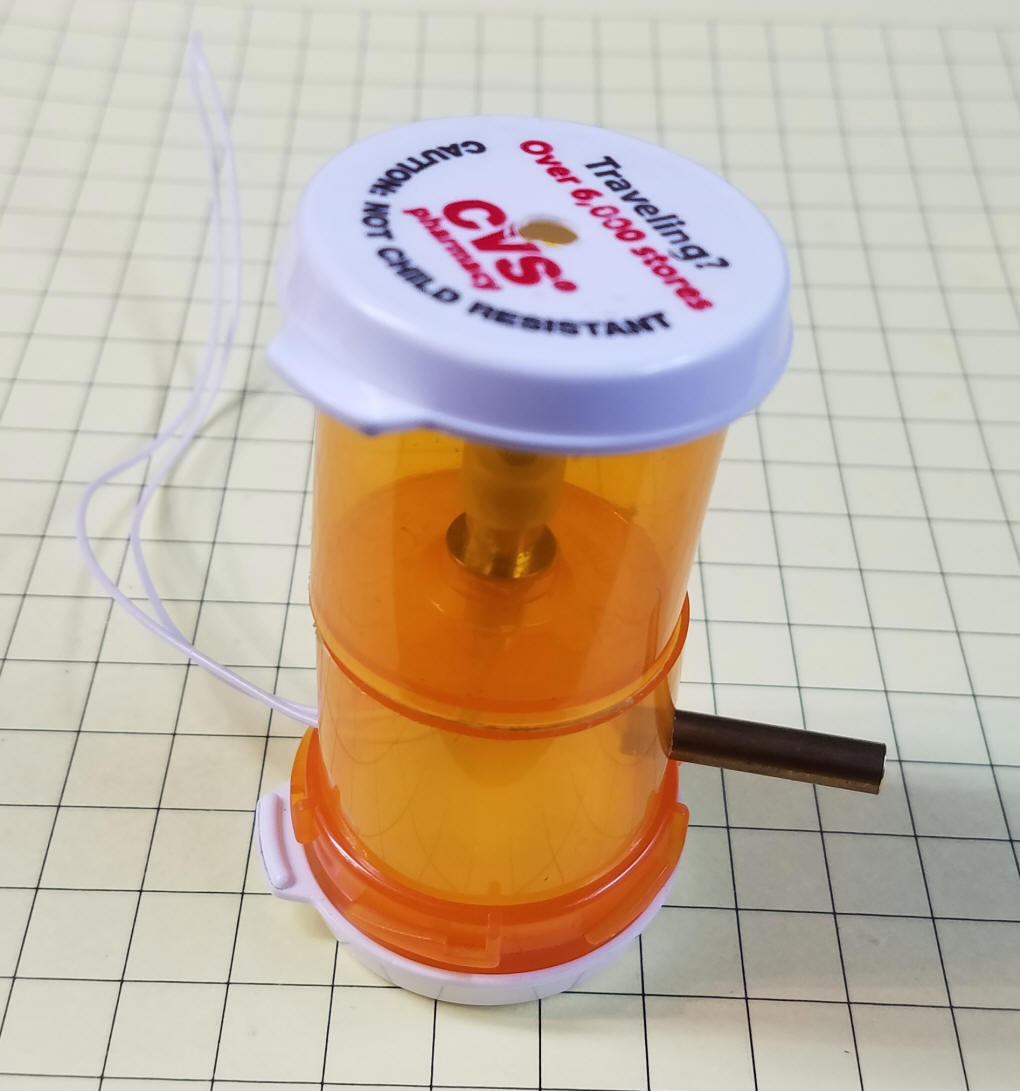
I joined the two parts of the bottle with electrical tape.
You can test the unit by adding a small amount of "juice" to the top compartment. Make sure it hits the wick material but does not go above it. Connect the wires that go to the heating element to 3.7 volts and blow into the brass tube - you should be rewarded by a nice plume of smoke!
|
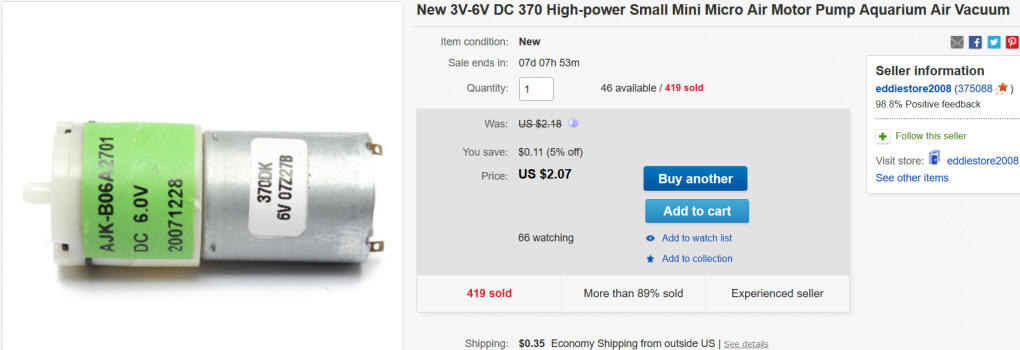
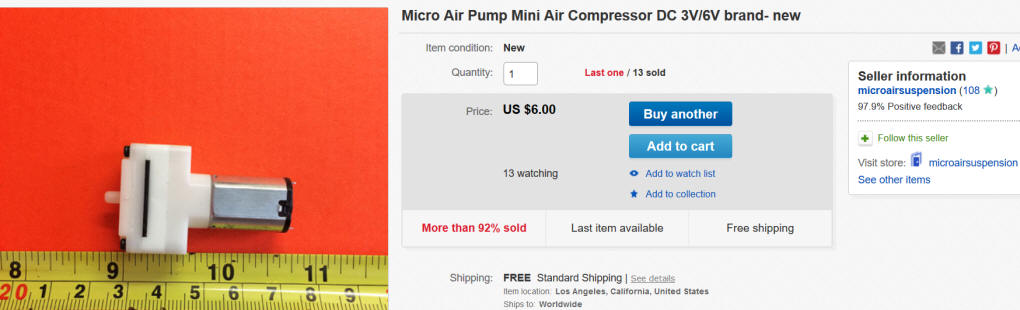
| Pump Options There are a number of small, DC powered motors available on eBay and through Amazon. The one that I have had the most success with is shown here. It works with voltages that are the same as those used with the heating element, simplifying supplying power. The dramatic difference in price is due to one coming from China.
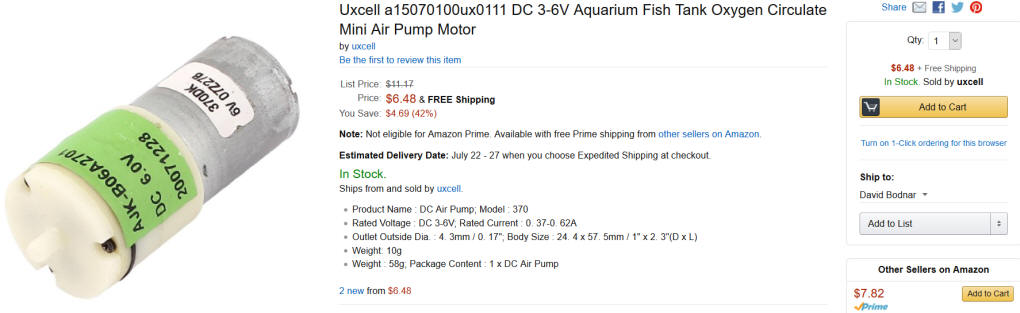
This one is from Amazon
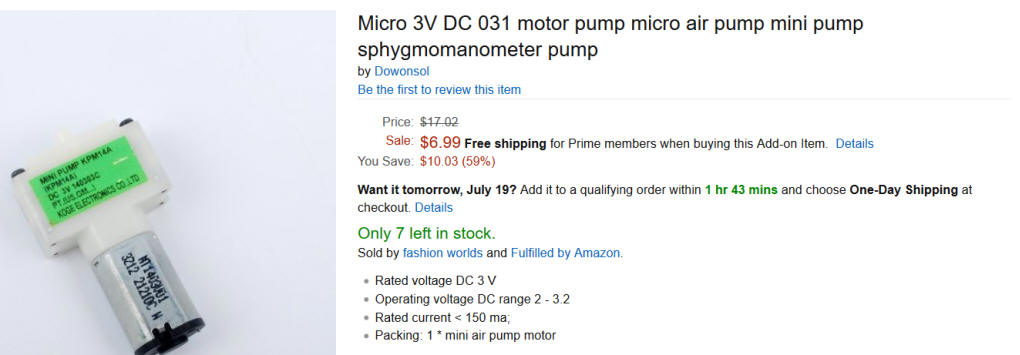
I have also tested another readily available pump. It works well but has a smaller air output nozzle and is quite noisy. It is shown here from Amazon:
and here from eBay:
|
| Power Options The heating element expects to be powered by a 3.7 volt lithium battery. You can power you unit from such a battery or you can use a higher voltage that you run through a DC to DC converter (sometimes called a buck converter) The device that I used is inexpensive and has a graphical display showing the output voltage and the current being delivered. I set mine to 3.7 volts and found that my test unit drew a bit more than 1 amp. I have purchased them from Banggood.com for a very attractive price.
They are also available from eBay.
|
| Conclusion I would suggest not running the smoke unit continuously but at intervals. I have run a test having the power applied for 30 seconds then off for 60 seconds. The unit worked flawlessly for 6 hours. I would be interested in hearing if you have had success with the smoke unit presented here and any modifications / improvements you have made.
|
| Smoke Stack Installation This photo shows a complete smoke system that will be installed inside of a G-scale smoke stack. It consists of the smoke unit shown above, a small remote control receiver, a timer and a voltage converter. When the remote control is activated power is applied to the timer which turns on the power to the voltage converter that supplies the motor and smoke unit. After about 30 seconds have expired the smoke is turned off by the timer which pauses for 5 minutes before automatically turning it on for another 30 seconds. The remote control can be turned off at any time or power cycled (off then on) to immediately restart the 30 seconds of smoke.
|
| This wiring diagram shows the parts of the
system. 12 volts DC is applied to the remote control which
powers the timer, voltage converter and, ultimately, the smoke
generator and air pump.
|
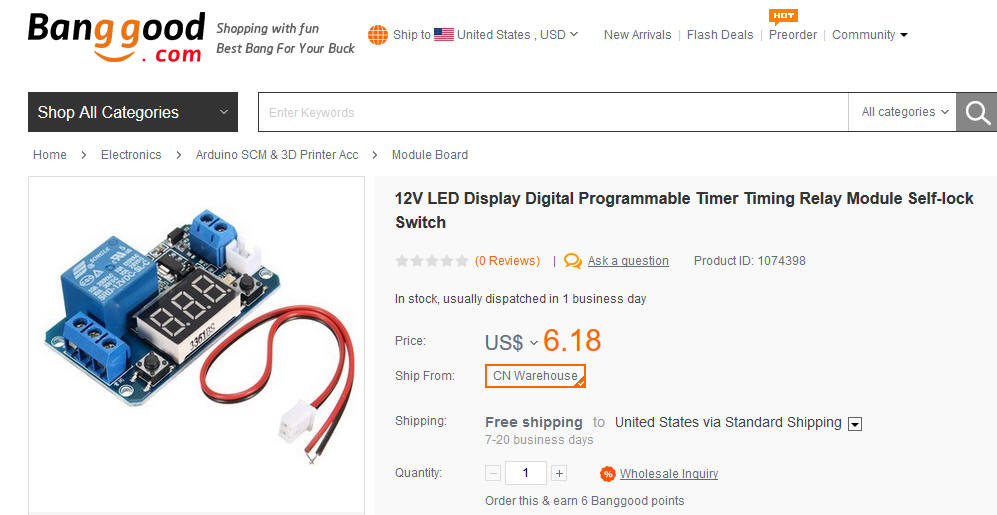
| The timer is from Banggood - see:
http://www.banggood.com/12V-LED-Display-Digital-Programmable-Timer-Timing-Relay-Module-Self-lock-Switch-p-1074398.html
|
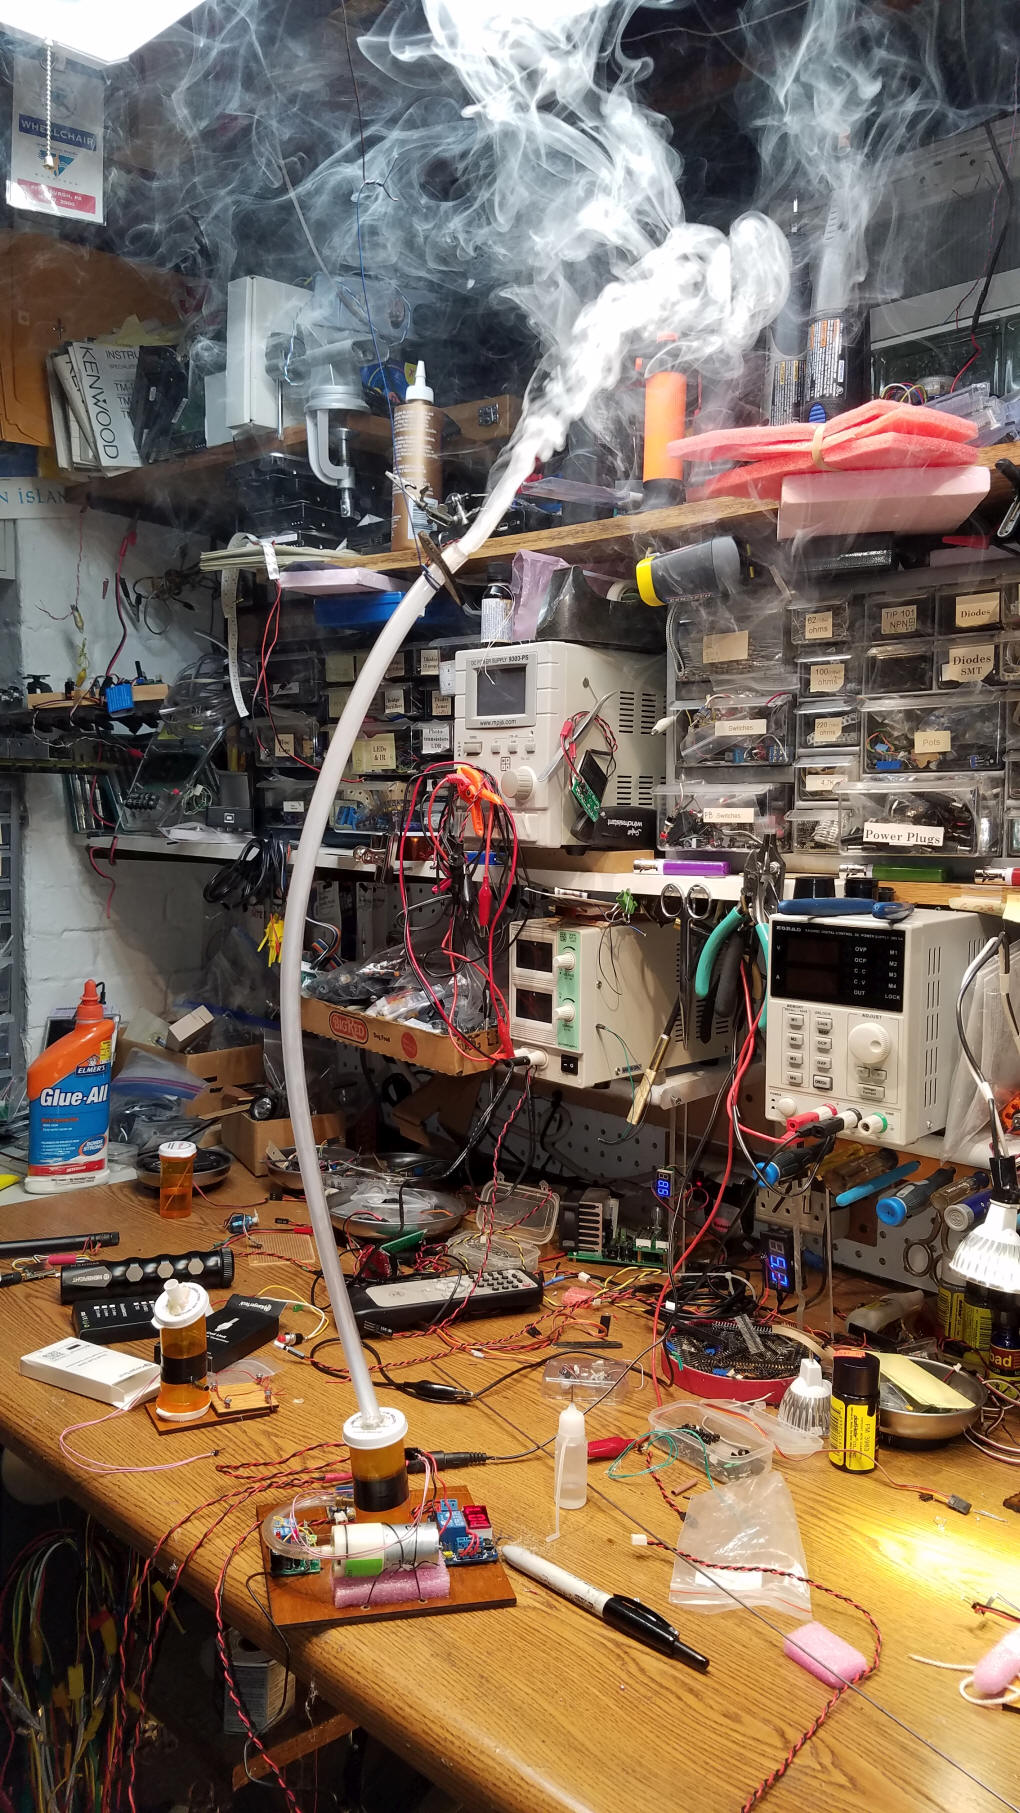
| This view shows the main components.
Note that the voltage converter is set to 3.52 volts and that the
unit is on and is drawing 1.99 amps - quite a bit of power!
The timer has 20 seconds remaining. The air pump has been
mounted on a foam pad to cut down on noise and vibration.
|
|
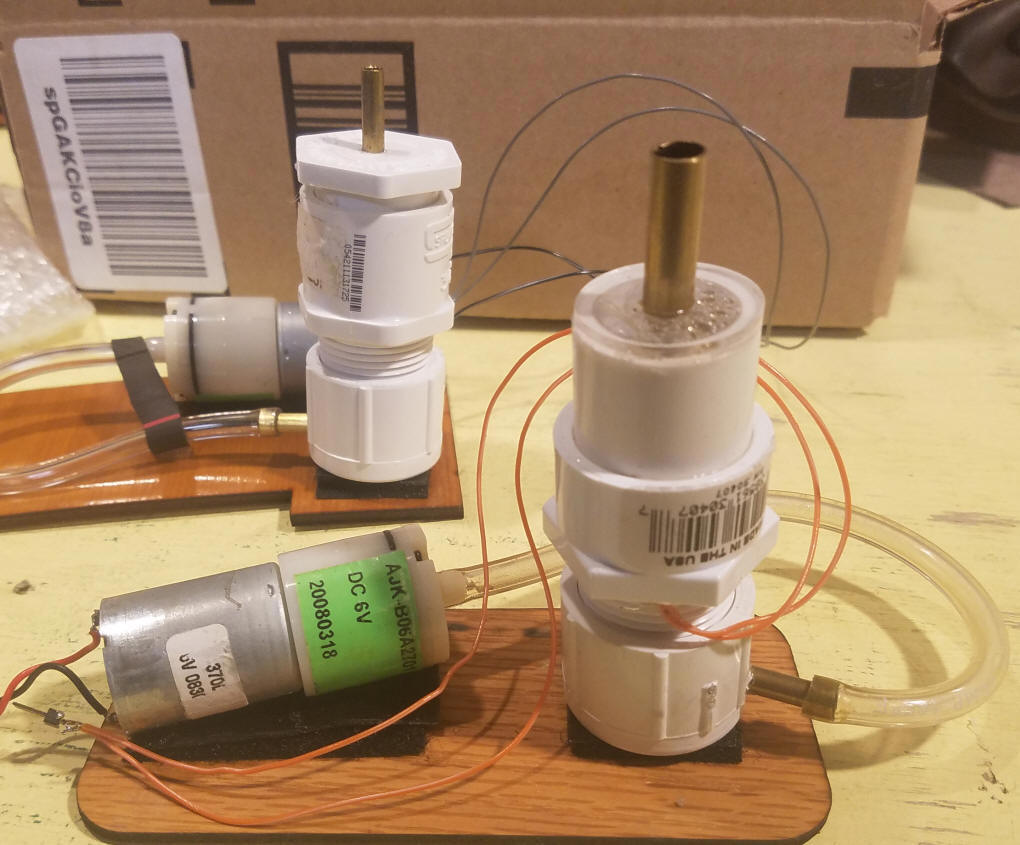
Running Time Observations Initially I thought that the smoke heater units were only good for intermittent operation, such as the use a smoker would make of them. I did some tests to see if this was true or not. I put together the setup shown below and ran it for nearly an hour at 3.8 volts @ 2.5 amps. This was using one of the heavy duty heating coils that are available here
I repeated the test with a standard heating coil and it ran for 1 hour 15 minutes before I turned it off. I am sure that it would have worked for a longer time but the glycerin began to bubble as though it was boiling.
It looks like the heating coils are good for continuous, or at least nearly continuous duty. At higher power levels a good deal of smoke is generated and the reservoir of fluid needs to be replenished every 30 or 40 minutes. This could be made less frequent by using a larger diameter pill bottle. |
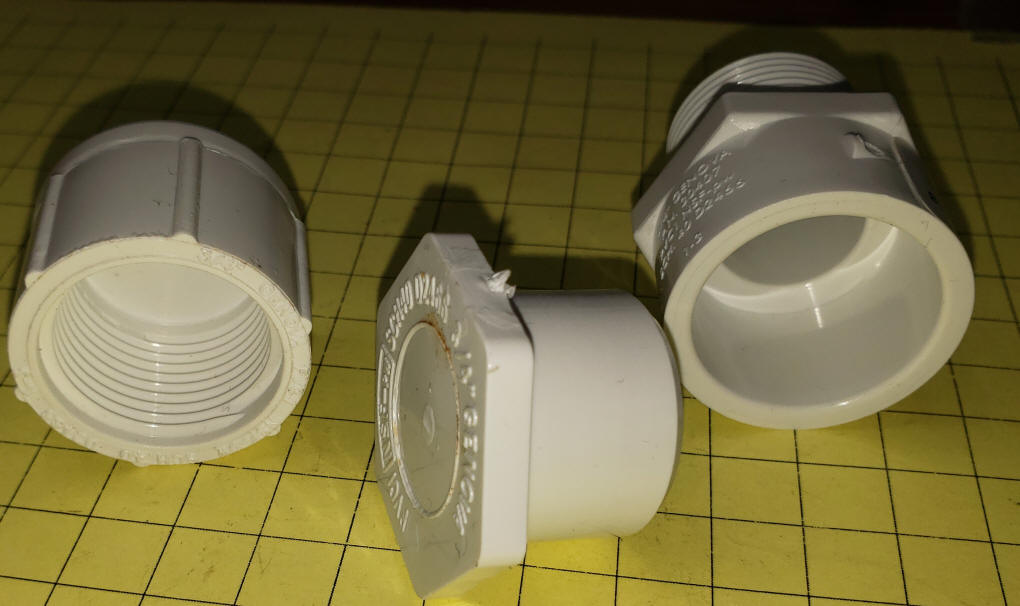
| The latest version of the smoke unit uses
simple plastic pipe fittings rather than old pill bottles. Here are the individual parts. 3/4" Schedule 40 PVC Male Adaptor3/4" Schedule 40 PVC Cap - FPT Threaded Cap3/4" Schedule 40 PVC slip plug
Here is another view of the three PVC parts that are used.
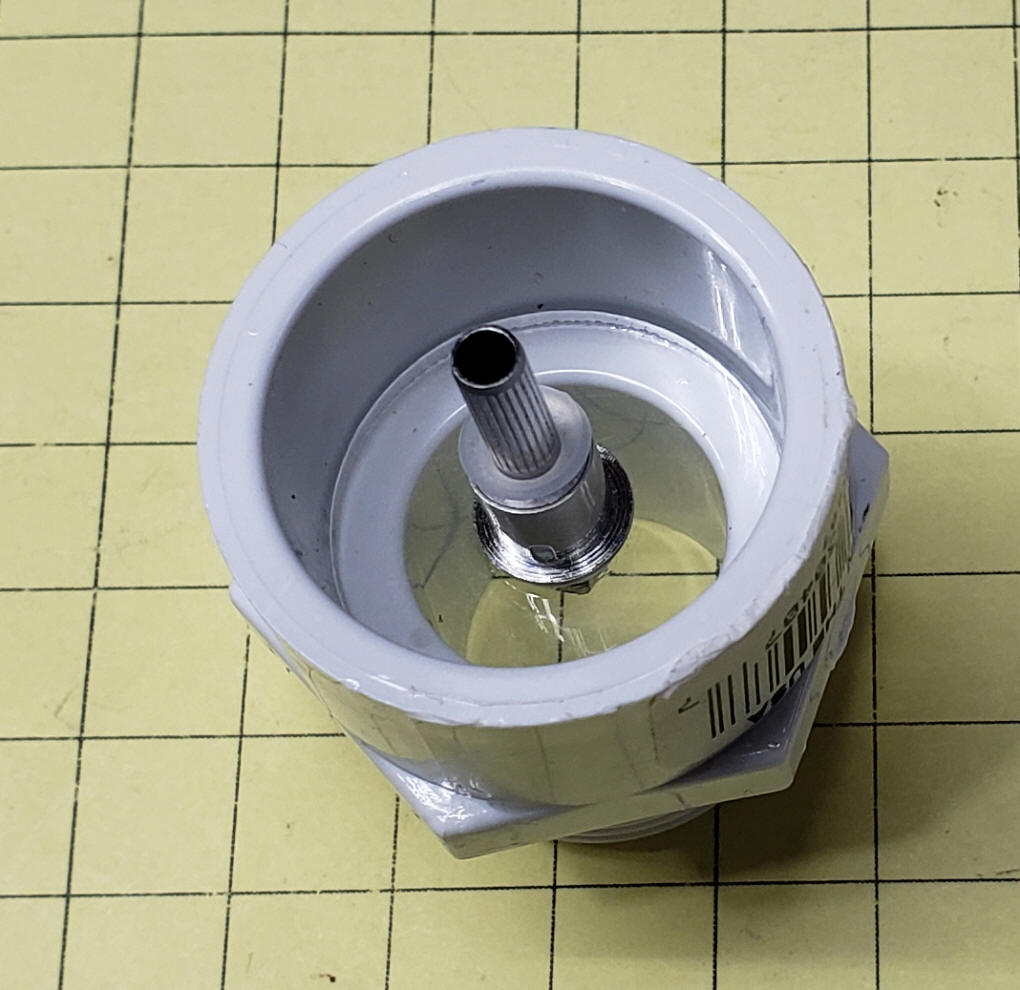
You will also need a plastic disk 1" in diameter with a hole in the middle sized to fit the smoke unit. 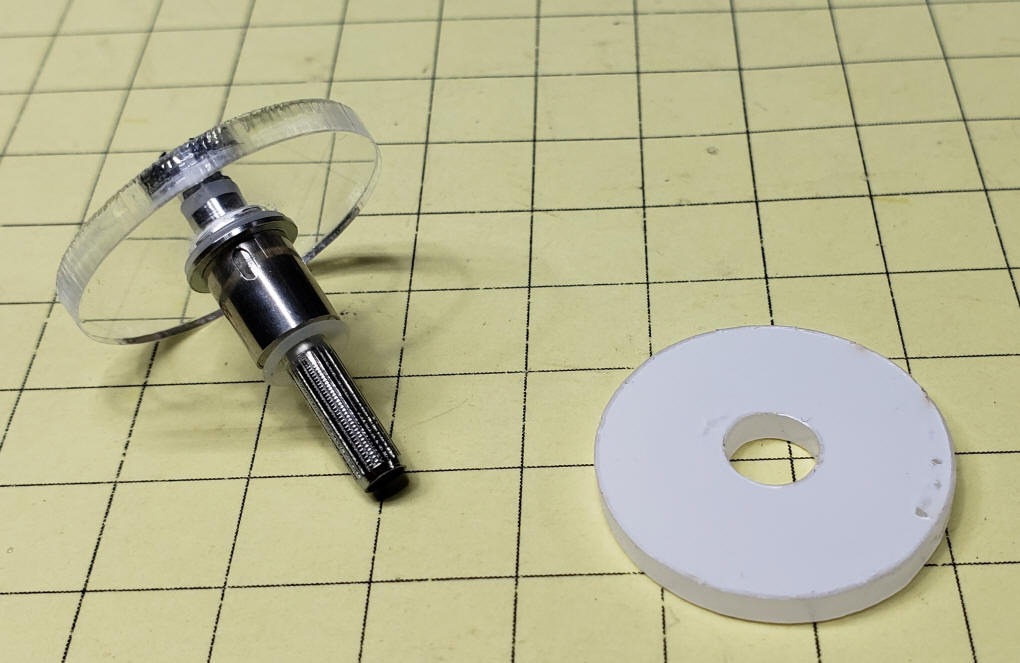 The disk with the heater is glued inside of the adapter. Note that the size of the disk is not critical as there is quite a bit of space for gluing.
|
 |