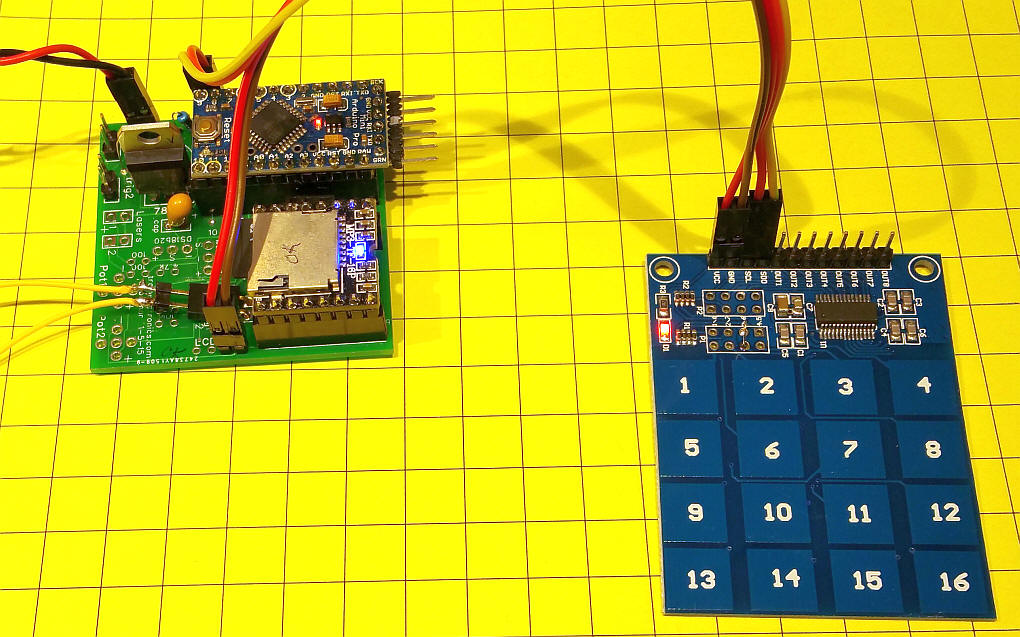
| Introduction This project is an extension of the article that describes how to make a simple, Arduino controlled MP3 player with the DFPlayer. Click here for that article: Arduino-basic-player The objective of this part of the project is to connect the DFPlayer board to an inexpensive 16 key keypad module. The unit that I used is from Amazon but they are available from many different vendors on eBay and elsewhere. Each key on the keypad will play one of the MP3 files on the DFPlayer. The two boards are connected by a four wire cable that carries power (Ground and + 5 volts) and data (SCL and SDO)
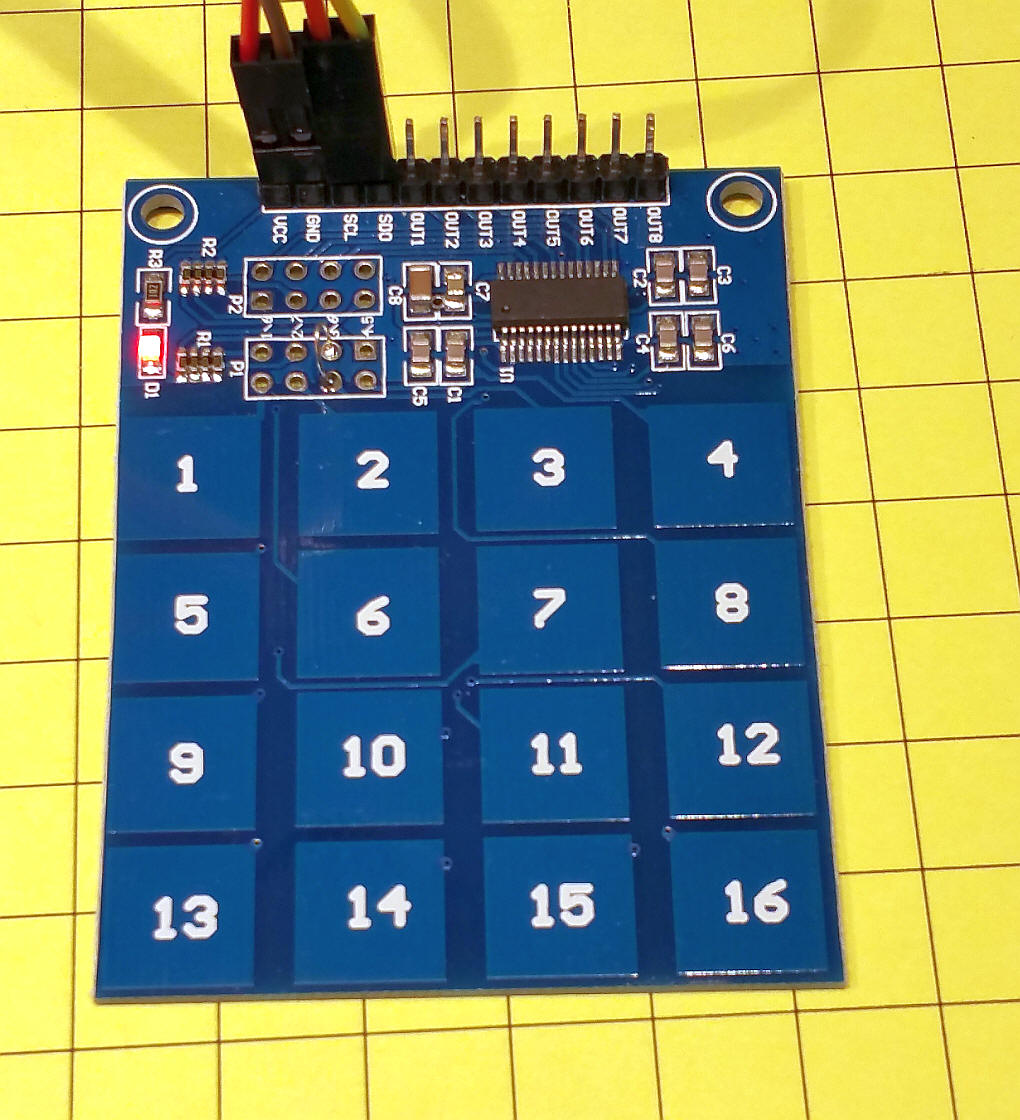
This close-up of the keypad board shows the four connections to the board.
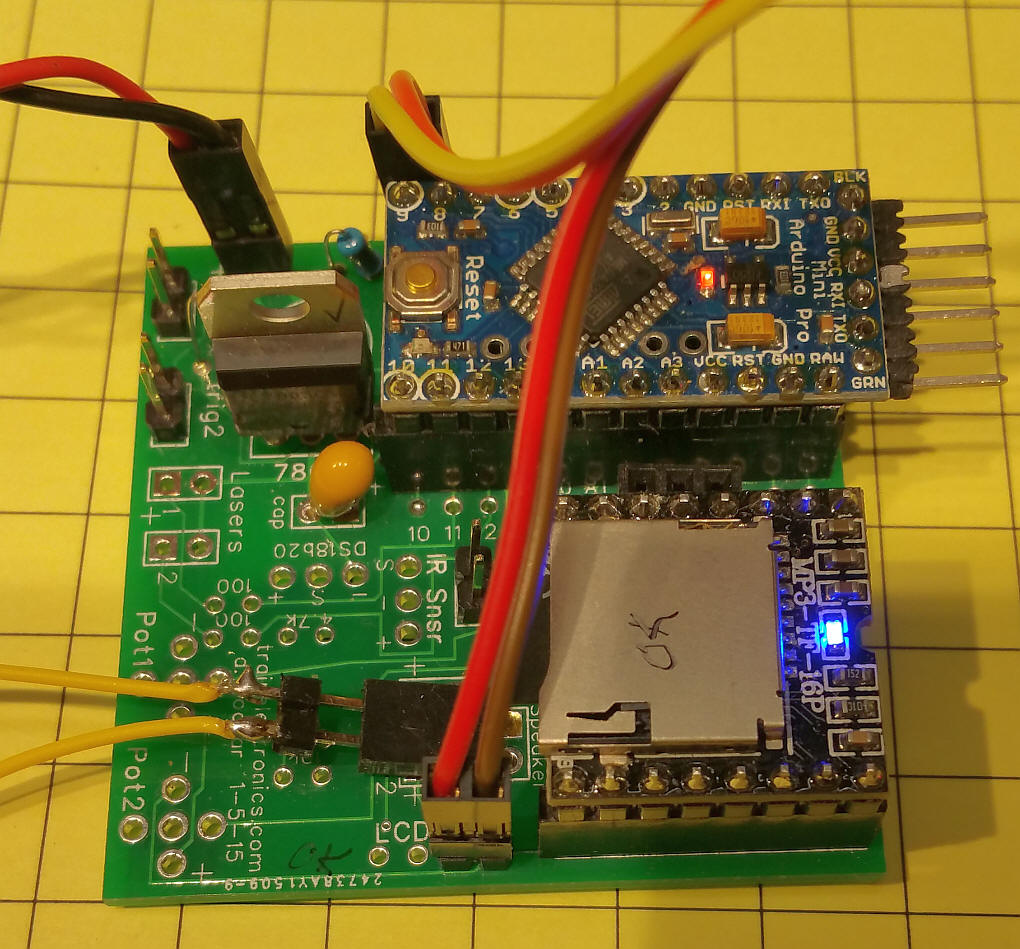
The DFPlayer / Arduino board is shown here. The two data connections (yellow and orange) go to pins 8 and 9 go to the Arduino. Power (+5 and ground) go to the board at the bottom of the photo.
|
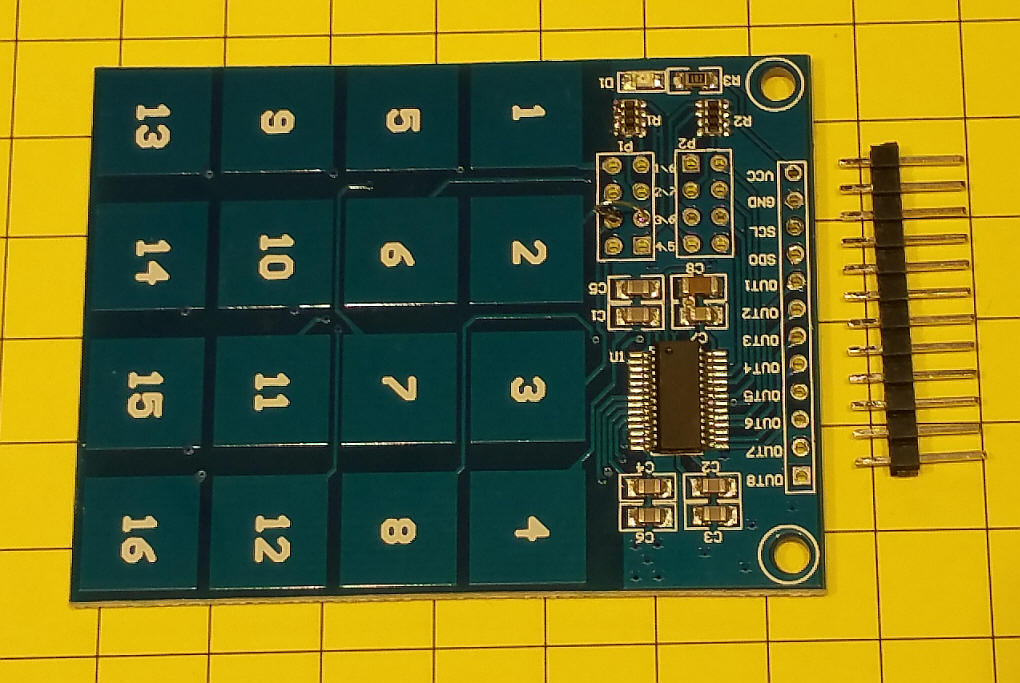
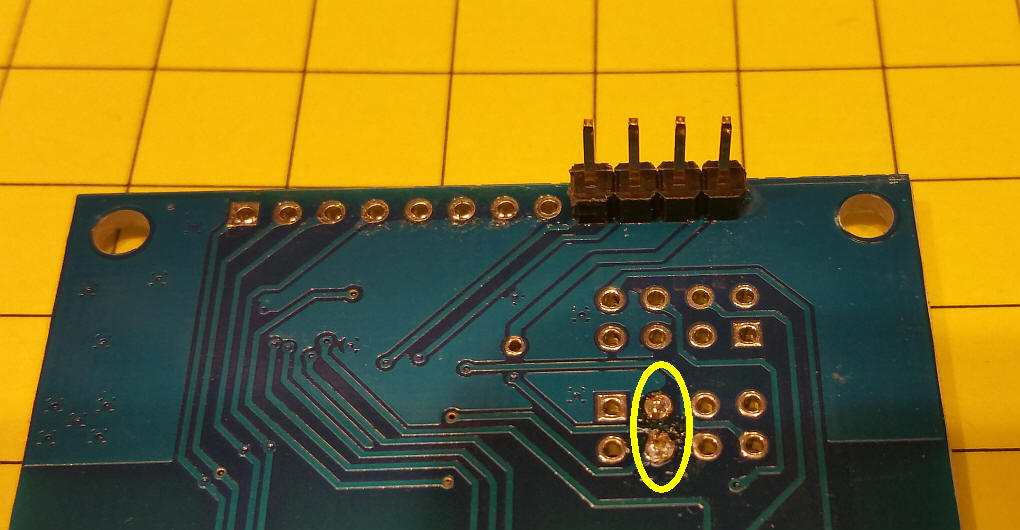
| One slight modification that I made was to
remove the existing 12 pin header that extends from the front of the
board. I used a solder-sucker to remove the solder from the back
of the board.
Once that was done I replaced it with a 4 pin header that extends from the back. Since we do not use the outputs labeled "out1--out8" only the first four pins are needed. This arrangement makes it easier for mounting the keypad on a display panel. Note the two pins that are jumpered (circled in yellow)
|
| Schematic The only difference between the schematic shown here and the one from the other article is the addition of the keypad and its data connecctions.
|
| Pin 1 on the keypad - 5 volts Pin 2 on the keypad - ground Pin 3 on the keypad - Arduino pin 8 Pin 4 on the keypad - Arduino pin 9 |
/* d. bodnar revision - 11-11-15 This one works - be sure to jumper as per web page here:
 *keypad code from  http://forum.hobbycomponents.com/viewtopic.php?f=73&t=1781&hilit=hcmodu0079
 *Working with DF Player
The sketch assumes that the keypad is configured to 16 key active low mode
by shorting pads P1-3 and P1-P4 together (see schematic or sport forum for more
information). Connect the keypad to your Arduino as follows:

Keypad......Arduino
VCC.........+5V
GND.........GND
SCL.........Digital pin 8
SDO.........Digital pin 9

You may copy, alter and reuse this code in any way you like, but please leave
reference to HobbyComponents.com in your comments if you redistribute this code.

/* Define the digital pins used for the clock and data */
#define SCL_PIN 8
#define SDO_PIN 9

/* Used to store the key state */
byte Key;

#include <SoftwareSerial.h>
#include <DFPlayer_Mini_Mp3.h>
const int buttonPin = 3;     // the number of the pushbutton pin
const int buttonPin2 = 4;    // second button pin
int ledPin1 = 11; // laser control
const int ledPin2 =  12;      // the number of the LED pin

int buusyPin = 10; // sound player busy
int bsy = 0;
int z = 0;

void setup()
{
  /* Initialise the serial interface */
  Serial.begin(9600);
  /* Configure the clock and data pins */
  pinMode(SCL_PIN, OUTPUT);
  pinMode(SDO_PIN, INPUT);
  pinMode(ledPin1, OUTPUT);
  pinMode(ledPin2, OUTPUT);
  pinMode(buttonPin, INPUT);
  pinMode(buttonPin2, INPUT);
  Serial.begin (9600);
  mp3_set_serial (Serial);  //set Serial for DFPlayer-mini mp3 module
  // mp3_reset();
  delay (400);
  mp3_set_volume (25);          // 15 is low for unpowered speaker - had to remove reset to get vol to work
  delay (400);
  Serial.println("");
  Serial.println("play MP3 files in sequence with trigger & random option  v3.1c-smaller");
  delay(100); // may be needed for initialization of sound
  randomSeed(analogRead(0));
  digitalWrite(ledPin1, HIGH);
  digitalWrite(ledPin2, HIGH);
  delay(1000);
  digitalWrite(ledPin1, LOW);
  digitalWrite(ledPin2, LOW);
}

/* Main program */
void loop()
{
  Serial.println("at top of loop");
  /* Read the current state of the keypad */
  Key = Read_Keypad();

  /* If a key has been pressed output it to the serial port */
  if (Key)
  {
    Serial.println(Key);


    /* Wait a little before reading again
       so not to flood the serial port*/
  //  delay(1000);

    mp3_play(Key);
    dlayPrint();
  }

}


/* Read the state of the keypad */
byte Read_Keypad(void)
{
  byte Count;
  byte Key_State = 0;

  /* Pulse the clock pin 16 times (one for each key of the keypad)
     and read the state of the data pin on each pulse */
  for (Count = 1; Count <= 16; Count++)
  {
    digitalWrite(SCL_PIN, LOW);

    /* If the data pin is low (active low mode) then store the
       current key number */
    if (!digitalRead(SDO_PIN))
      Key_State = Count;

    digitalWrite(SCL_PIN, HIGH);
  }

  return Key_State;
}

// routine to stay here till busy pin goes low once then goes high after speech item completes
void dlayPrint()
{
  digitalWrite(ledPin1, HIGH);
  while (digitalRead(buttonPin) == 1) {  //wait for button to be released
    //delay (100);
  }

  int bsyflag = 0;
  Serial.println(" ");
  Serial.print("busypin ");
  for ( z = 0; z <= 10000; z++) {
    bsy = digitalRead(buusyPin);
    Serial.print(bsy);
    delay(50);
    if (bsyflag == 1 && bsy == 1) {
      break;
    }
    if (digitalRead(buttonPin) == 1) {
      break;
    }
    if (bsy == 0) {
      bsyflag = 1;
    }
    Key = Read_Keypad();
    if (Key)
    {
      break;
    }

  }
  Serial.println(" ");
  digitalWrite(ledPin1, LOW);
  Serial.println("done");
}
|
|
|