Train Toter
08-11-2007
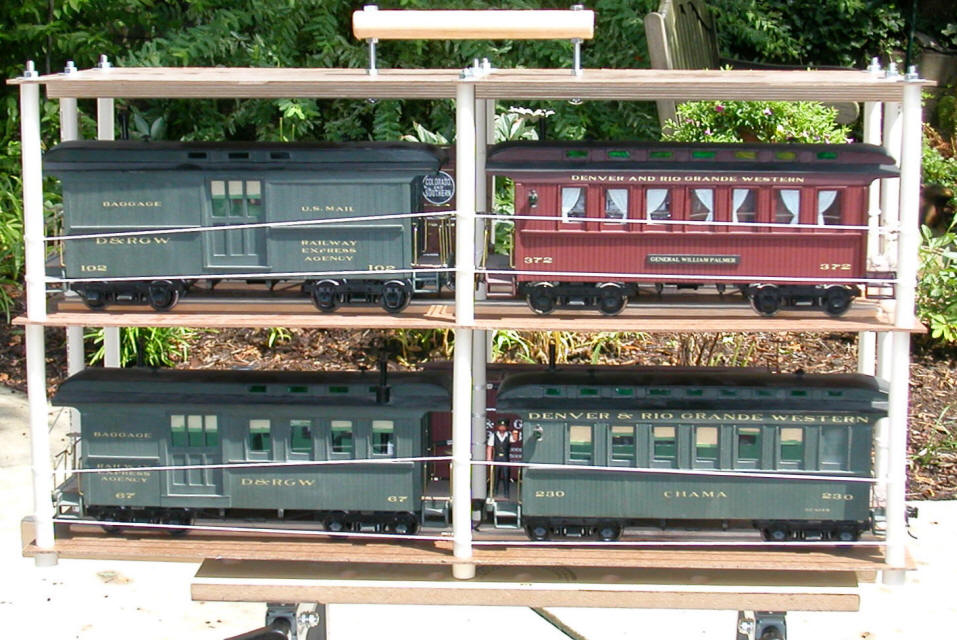
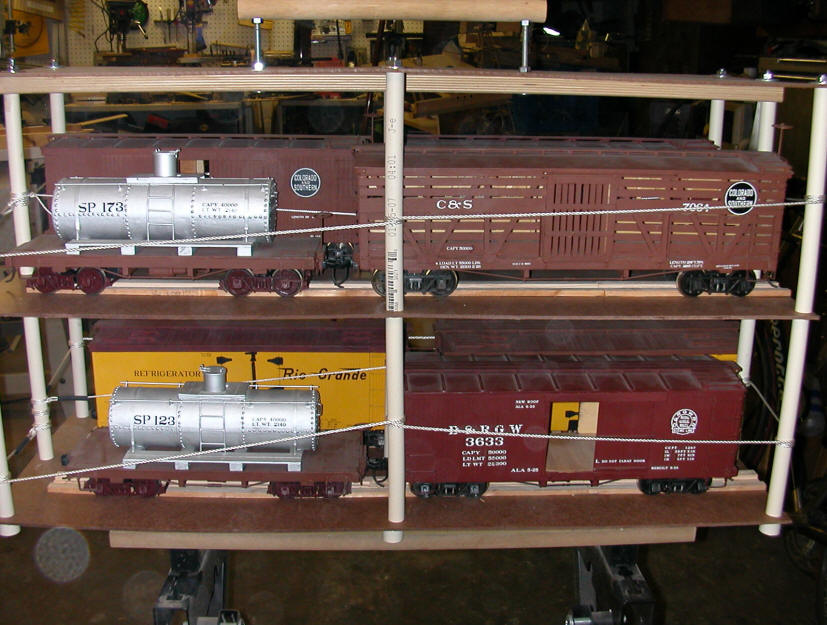
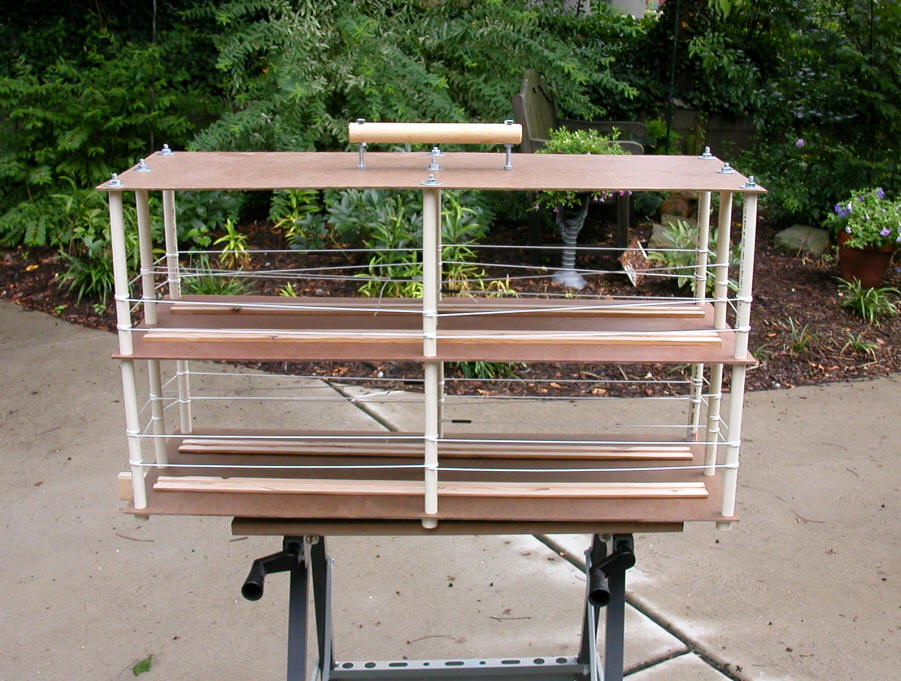
I recently purchased a collection of garden railway equipment that included 19 scratch built cars and 7 locomotives. Space to store all of the pieces immediately became a concern as well as the need to transport them from the basement to the back yard. I put together a quick & dirty "Train Toter" that provides a place to store much of the rolling stock and a convenient means of moving it around. The latest version of the toter can transport eight cars at one time. An easily adjusted nylon cord on the sides and ends secures the cars within the toter.
If At First You Don't Succeed...
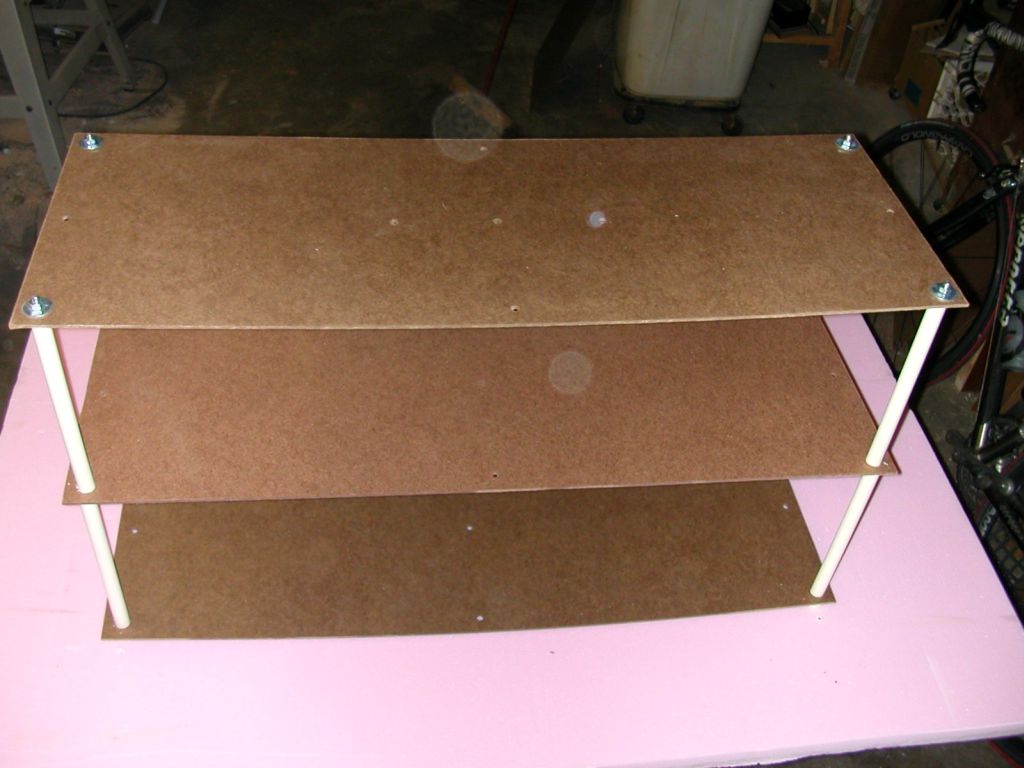
The first unit that I built proved to be too ambitious as it was designed to hold an engine, its tender and 10 cars. Even though it was plenty sturdy and held the cars securely its total weight was nearly 45 pounds. I quickly found that carrying such a load from my basement, up a flight of steps and into the back yard was not much fun. With dimensions of 48" X 12" X 21" it was just too bulky to carry around safely. The photos below show this first design.
![]()
![]()
Weight Reduction Surgery
Chopping off one third of the length and recentering the handle made it much more manageable. The weight with eight cars was reduced to about 25 pounds.
I decided to build a second train toter and have documented its construction below.
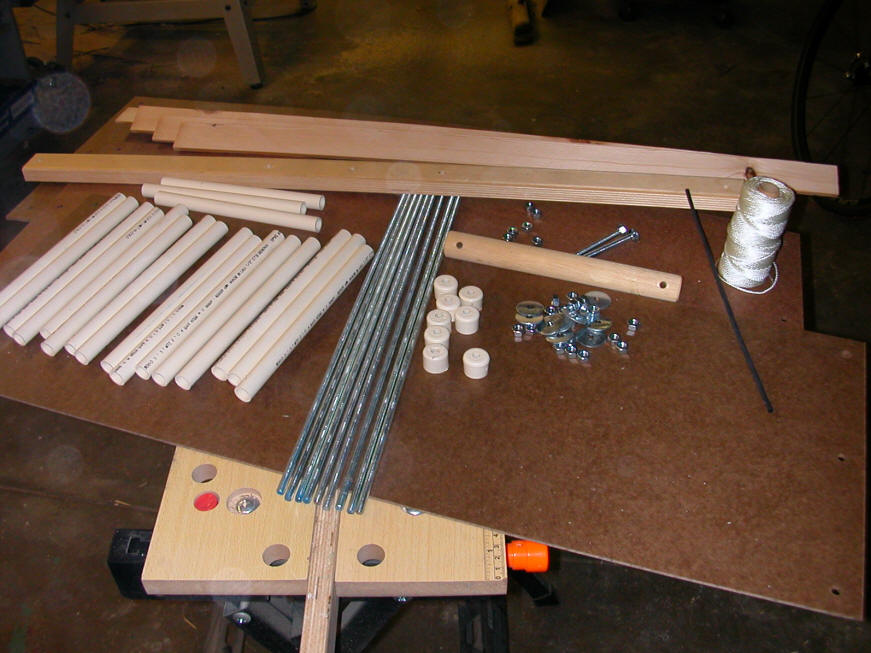
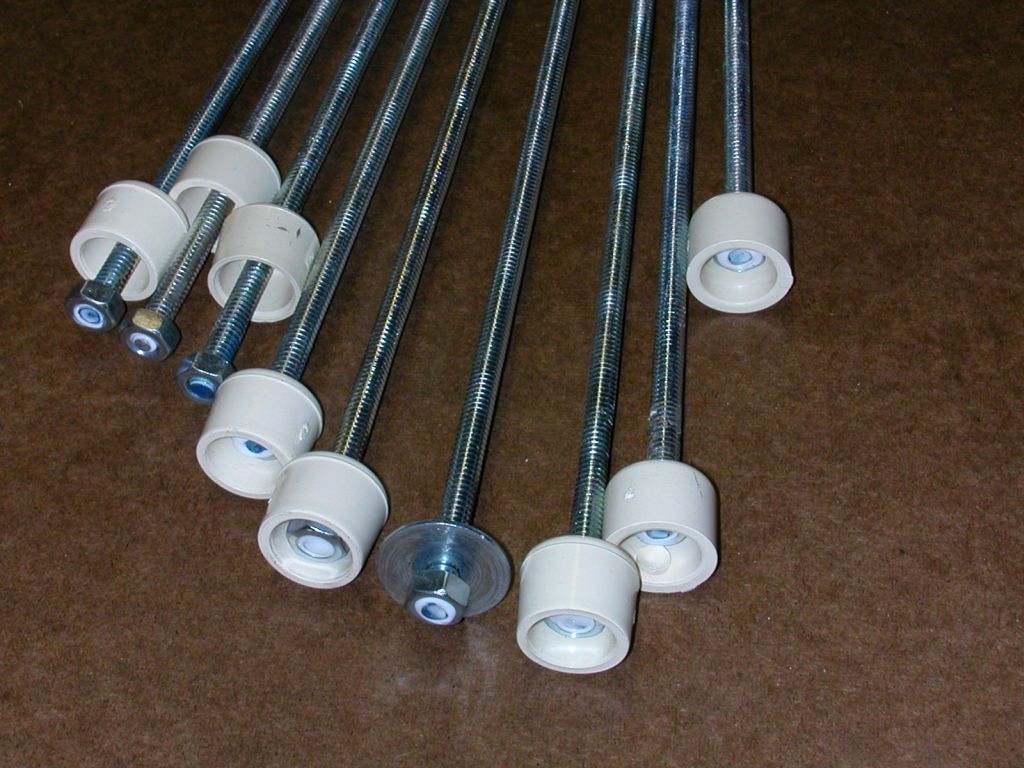
Parts
The parts that were used are available at most hardware stores and/or home centers. The total cost should be under $30.00 depending on how well stocked your junk pile is.
Everything you need except for the foam padding is shown in the photo below.
Cut and Drill Everything First
I found that this project went much faster the second time I did it as I had everything cut & drilled and ready to go before I started construction. The hardboard is cut from 24" x 48" sections that I picked up at the hardware store. Even though the parts list shows the width as 12" it is actually a bit under as the blade on the table saw that I used to cut it takes a bit of the width. Once you have 3 identical pieces of hardboard clamp them all together and drill all of the 1/4" holes. Each piece of hardboard has 9 holes in it. The top board has two additional holes, the ones that are for the handle bolts. The holes on the perimeter should be 3/4" from the edge.
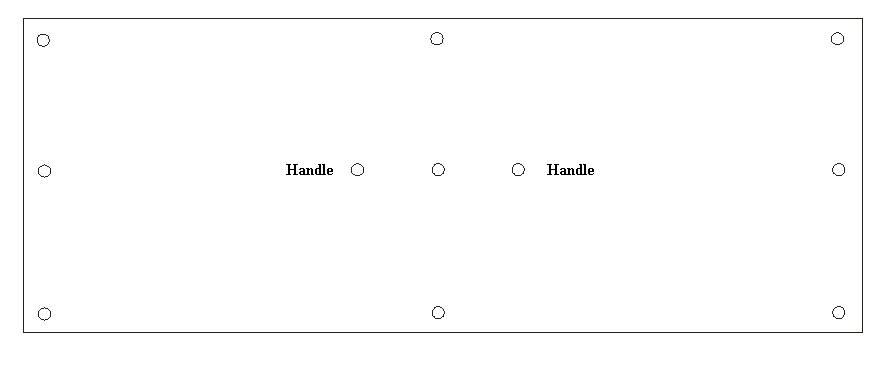
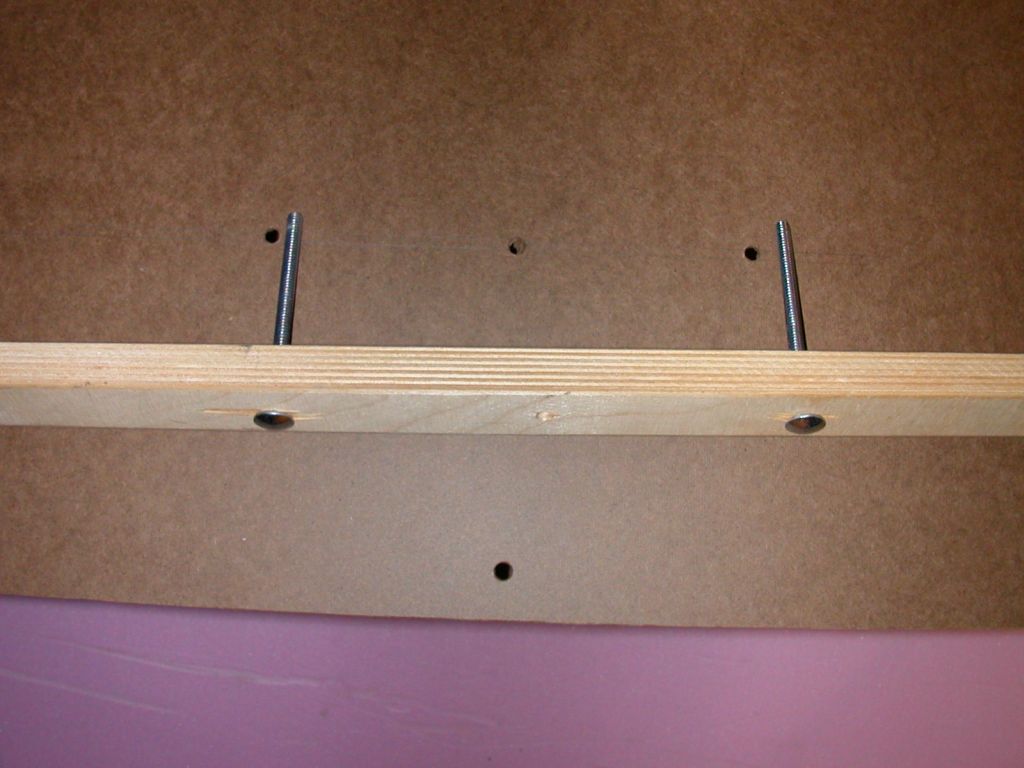
The top brace goes under the top of the unit and is held in place by the handle bolts and the three pieces of all thread that go down the center. I used the top shelf as a template to drill the first three holes in the brace.
Drill 1/4" holes in the ends of the handle about 3/4" from each end. Take care that the two holes are parallel or you will have difficulty bolting the handle in place. If possible use a drill press to drill them. Center the handle on the top shelf and use it as a guide to drill through the top and the brace. You will find it easier to hold everything in alignment if you temporarily bolt the brace to the top shelf while you are drilling the holes for the handle.
Lots of Nuts & Washers
The 1/2" pipe caps are used as feet. Put a nut on the end of each piece of all thread. Run the rod through the 1/4" hole that you need to drill in each pipe cap. The nut should fit within the cap. Note that I did not use a pipe cap foot on the middle rod. I only had 8 end caps and that one seemed the logical one to skip! If you look carefully you will see that I put a drop of glue on each nut to help secure it so that it wouldn't untighten and fall off while I tightened the nuts at the tops of the rods.
Put four of the rods through the bottom shelf. Put a piece of the 8" plastic pipe over each rod. Note that it will be extremely wobbly!
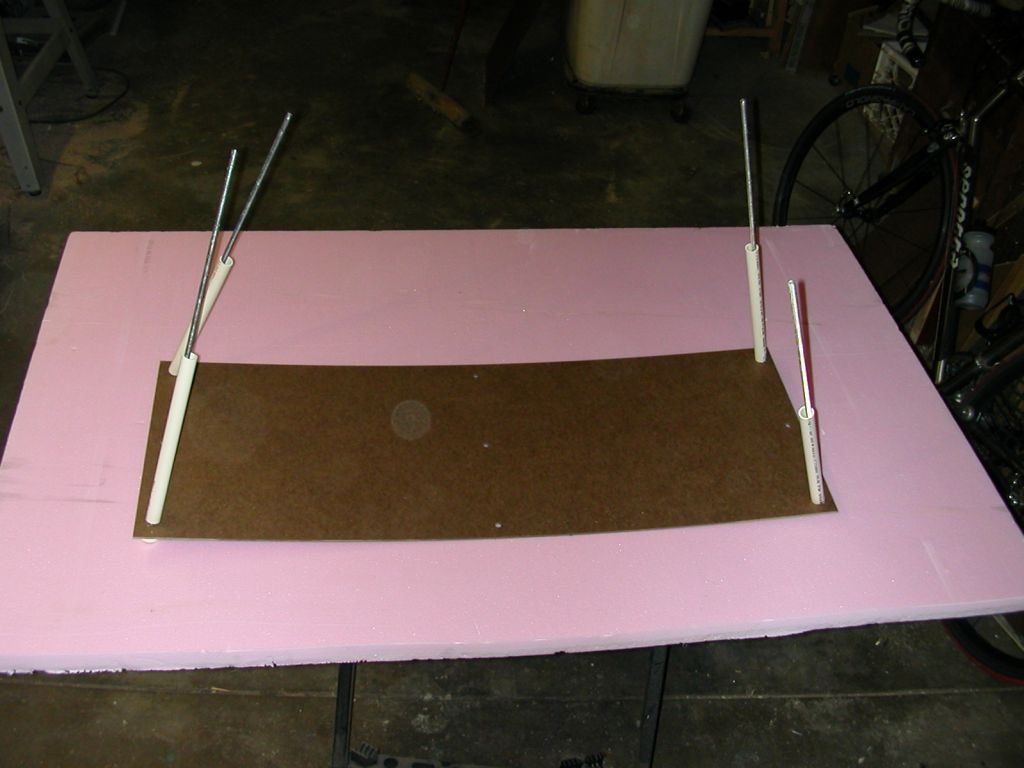
Add the second shelf.
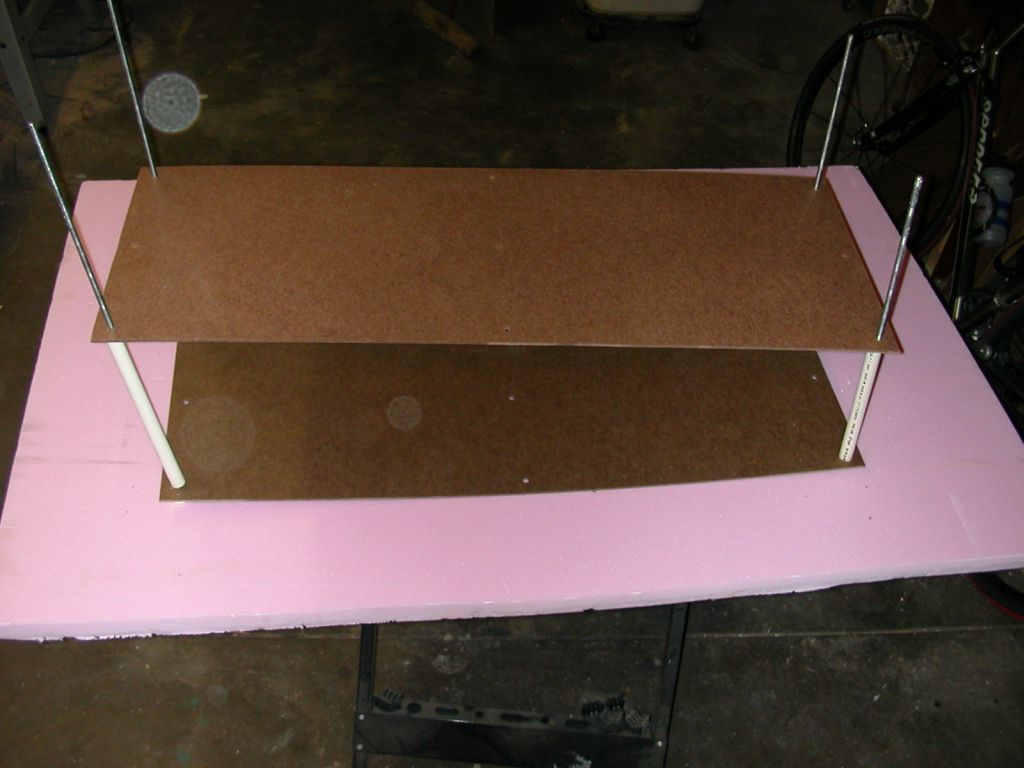
Add four more sections of 8" pipe and the top shelf. Secure with four fender washers and four nuts. Finger tight is OK for now.
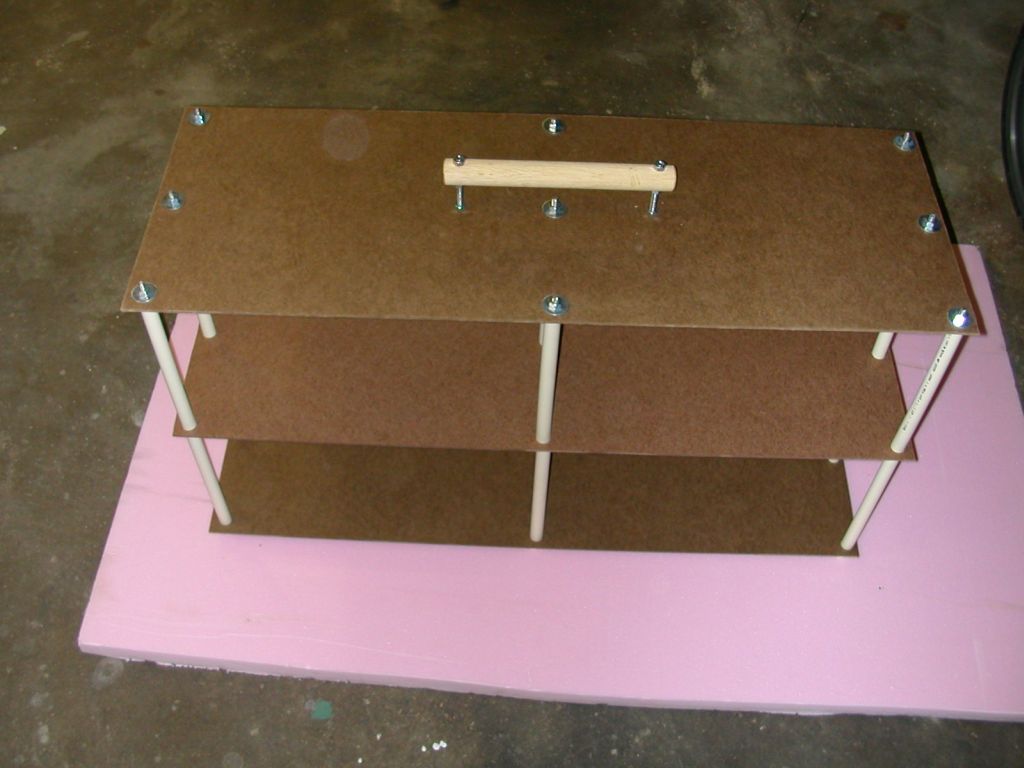
Put the two 3 1/2" carriage bolts through the handle holes in the brace. Push them through the bottom of the top shelf so that they protrude through the top.
Lay the unit on its side and insert the remaining pieces of all thread from the bottom. As soon as the rod goes through a hole in a shelf add one of the pieces of plastic pipe. You will use the three shorter lengths of plastic pipe for the rods that go through the top brace.
Add washers and nuts to the tops of the all thread and tighten securely. Each of the handle bolts has three nuts on it. One holds the bolt securely to the top shelf and the other two are on either side of the dowel itself. Tighten these securely.
That is it for the construction of the unit itself. The unit is now very sturdy. All that remains is to add a means to secure the cars that it carries.
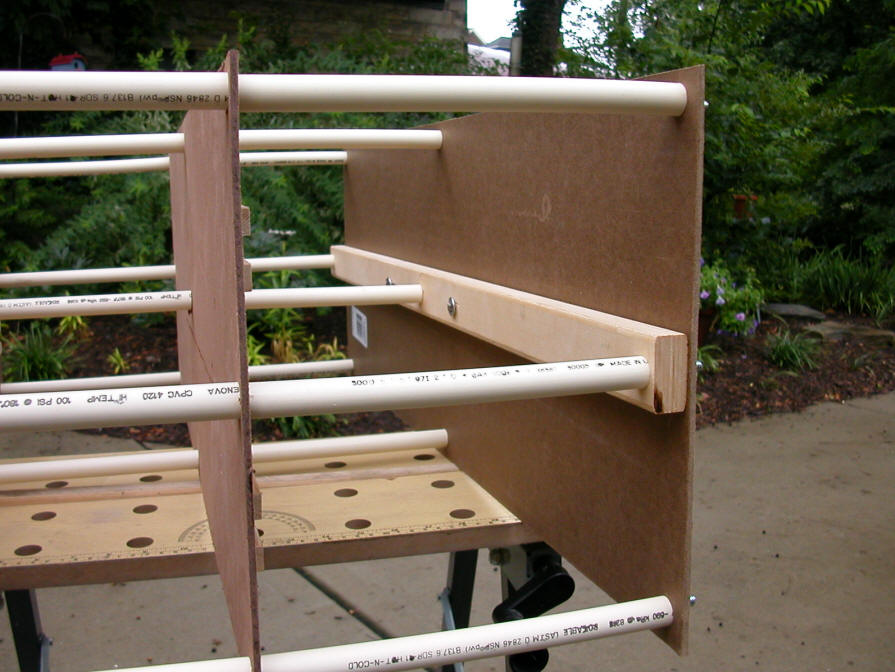
Wheel Stops
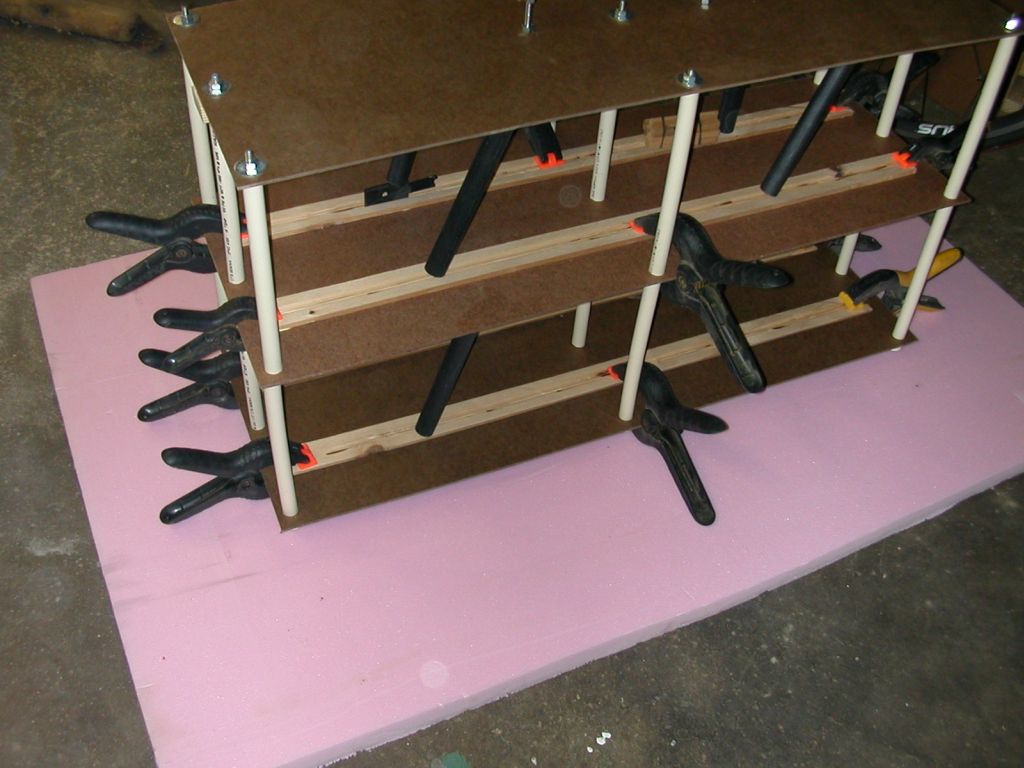
The 1 1/2" x 1/4" wood strips run down the center of each side of each shelf. They should just fit between the wheels on the cars. I glued mine down with the edge of each strip 2 1/2" from the edge of the platform.
The cars I want to use with these shelves have Kadee couplers so I had to do one more thing that you may be able to avoid. The rod that extends below the coupler dragged on the 1/4" high wood strip so I ran them through the table saw a few times and made a dado down the center of each strip that gives the coupler rod a place to go.
.JPG)
The strips are simply glued down with clamps holding them in place until they are dry.
Nylon Cord
Even thought the strips of wood under each car do a good job of restricting the cars' movement from side to side I needed something to block the ends and to stop the cars from tipping over and falling out. Nylon cord has proven to be a good solution. It is relatively soft and is unlikely to scratch or damage fragile parts. In addition you can easily slide it up or down the plastic pipe to adjust for different cars. I always "cut" nylon cord by melting through it with a flame. This securely seals the end so that it will not easily unravel. Avoid using a knife to cut it.
To fully secure the knots that hold the cord in place I slid a piece of heat shrink tubing over the cord and knot. This may be overkill but I have had knots in nylon rope loosen on me before!
.JPG)
I tied the end of the cord to the center post and proceeded to wind it (twice around each post) from post to post.
.JPG)
I used one section of cord on the top and another on the bottom. Each went around the whole section twice, once high and once low.
Securing the cars was just a matter of sliding the cord down,
.JPG)
carefully inserting the car and sliding the cord back up.
.JPG)
On some cars the cord was placed higher up than on others.
.JPG)
Here you can clearly see the difference between the first unit (below with one strand of cord) and the newer unit (above with two strands on each level). The double cord may not make much difference functionally but it looks more secure to me!
.JPG)
Foam Rubber, Too
The cord does a great job of holding the cars when I transport them for short distances. For trips in the car I add 2" thick strips of foam rubber placing one between each car and the nylon cord.
.JPG)
.JPG)
Conclusion
I hope you got some ideas from this article. If you have any comments or improvements for the design I would be glad to hear from you!