| Circuit design: Most PIC and PICAXE chips can control
model airplane servos. These servos are ideal for animating
any number of things on a model railroad layout. Use of servos
has been explored in great detail in another article,
Animate Your Layout With Servos
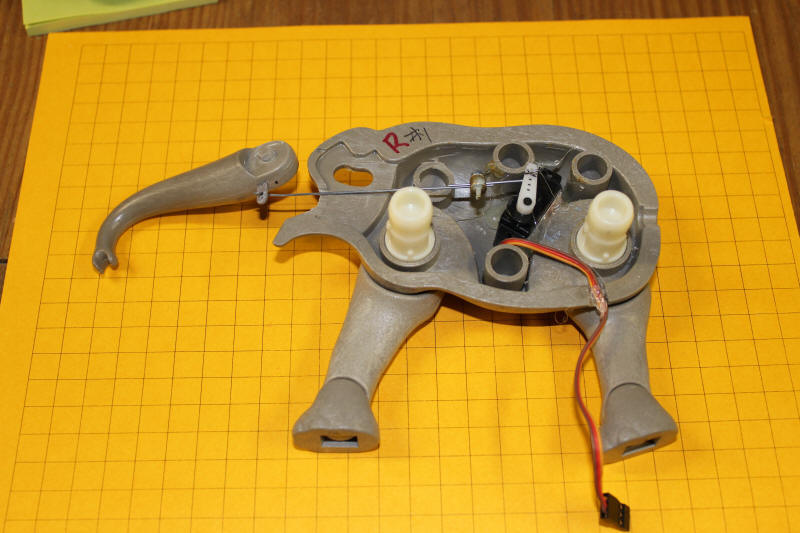
For this animation a very small servo (a
micro-servo) will be placed inside of the elephant. These
servos are readily available on eBay ( search eBay for "micro
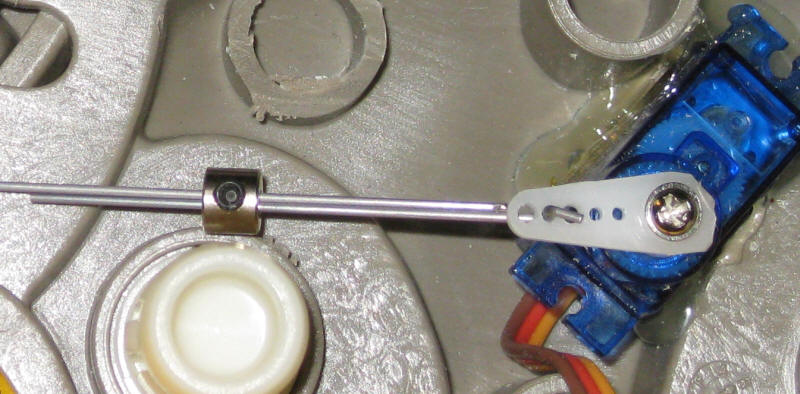
servo") In the two photos below you can
clearly see the servo and the control wire that goes to the trunk.
A small section from one of the servo's horns was glued into a hole
in the bottom of the trunk to facilitate moving it. The servo
itself was glued in with hot melt glue. This make removal and
replacement easy. The servos have been lasting 4-6 months at
Children's - not bad for such a small unit!
|
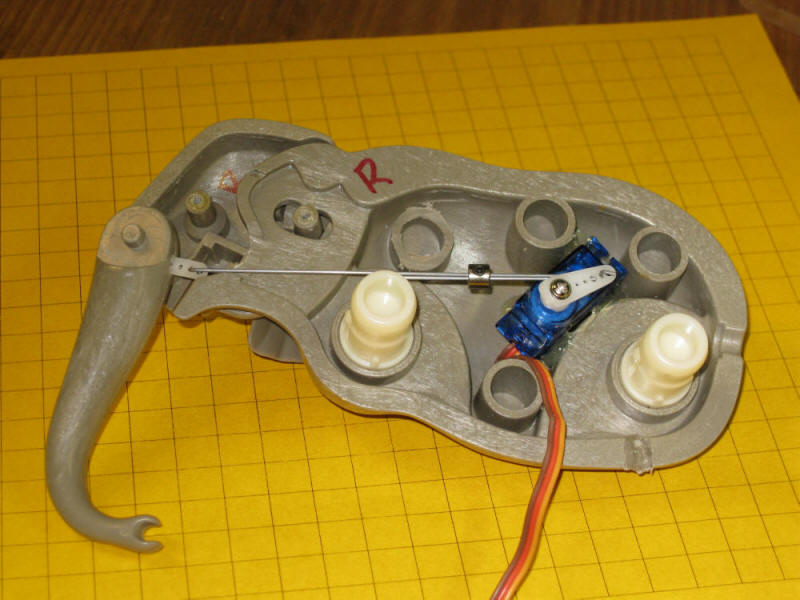
| In this photo you can see the section of a servo
horn that was glued into a small hole that was cut into the bottom
of the trunk with a Dremel. I drilled three very small holes
side by side to get space to insert the piece of the horn then used
epoxy to glue it in.
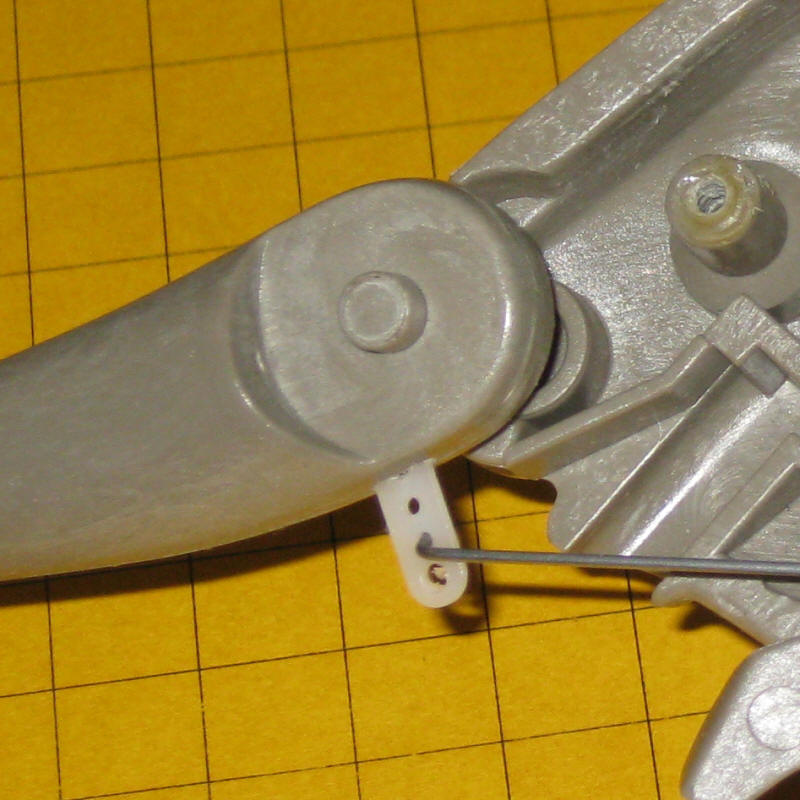
The fitting in the center of the photo (Du-Bro
part # 139) made adjusting the length of the control wires quite
easy. You can also see that one of the internal posts (just
above the fitting) was cut down to provide clearance for the wire.
When installing the horn on the servo make sure
the servo is rotated all the way counter clockwise when the horn is
in the position shown below. It is OK to rotate it manually
before putting the screw into the horn,
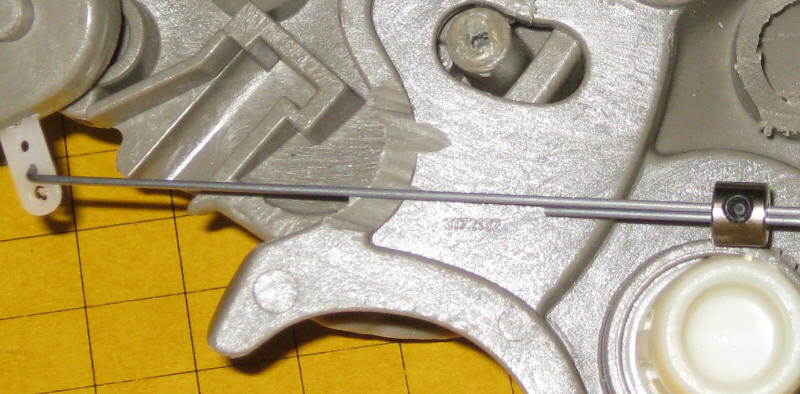
You can see here that some of the elephant's body
was ground away (center of the photo) to allow the wire to exit.
|
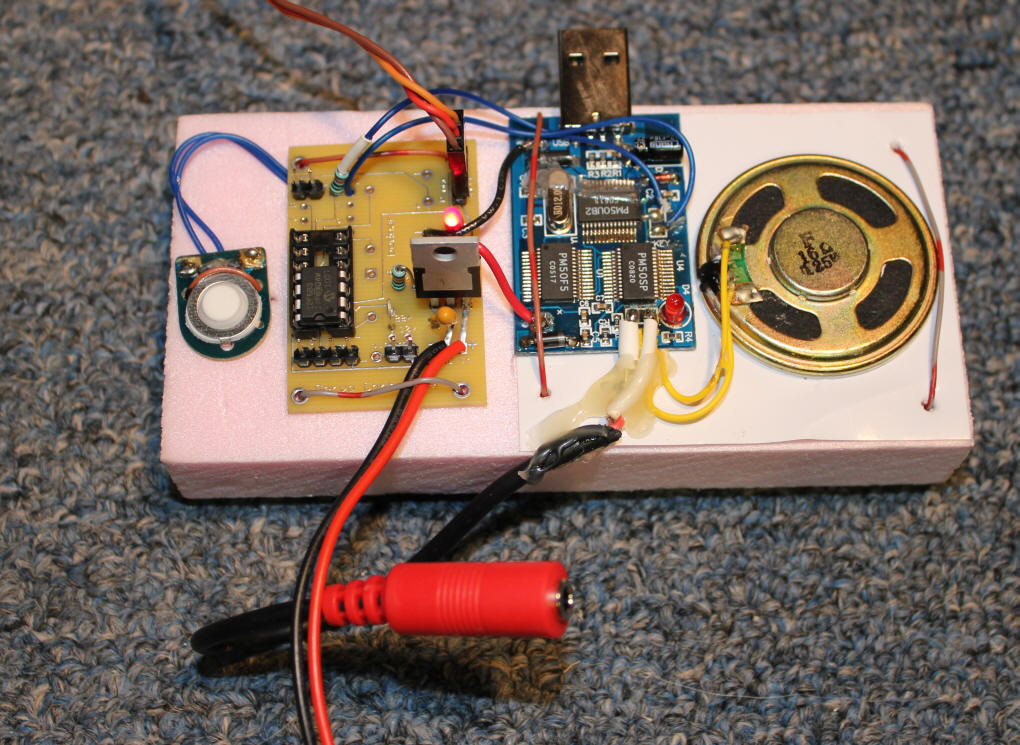
| Completed Unit The completed Elephant Animation Unit is
shown here. The main circuit board is to the left. It
has a connection (3 wire plug in upper right) that goes to the servo
- note that the brown wire goes to the pin closest to the center of
the board (marked -). The power connection goes to the red &
black wires at the bottom.
The sound unit is the blue board to the right. Speakers
plug into the red receptacle at the bottom. The demo speaker
is at the right. It is not needed and can be disconnected by
cutting either or both of the yellow wires that go to it.
The button at the far left is to start the unit. Another
button can be connected by the two pins in the upper left corner of
the board.
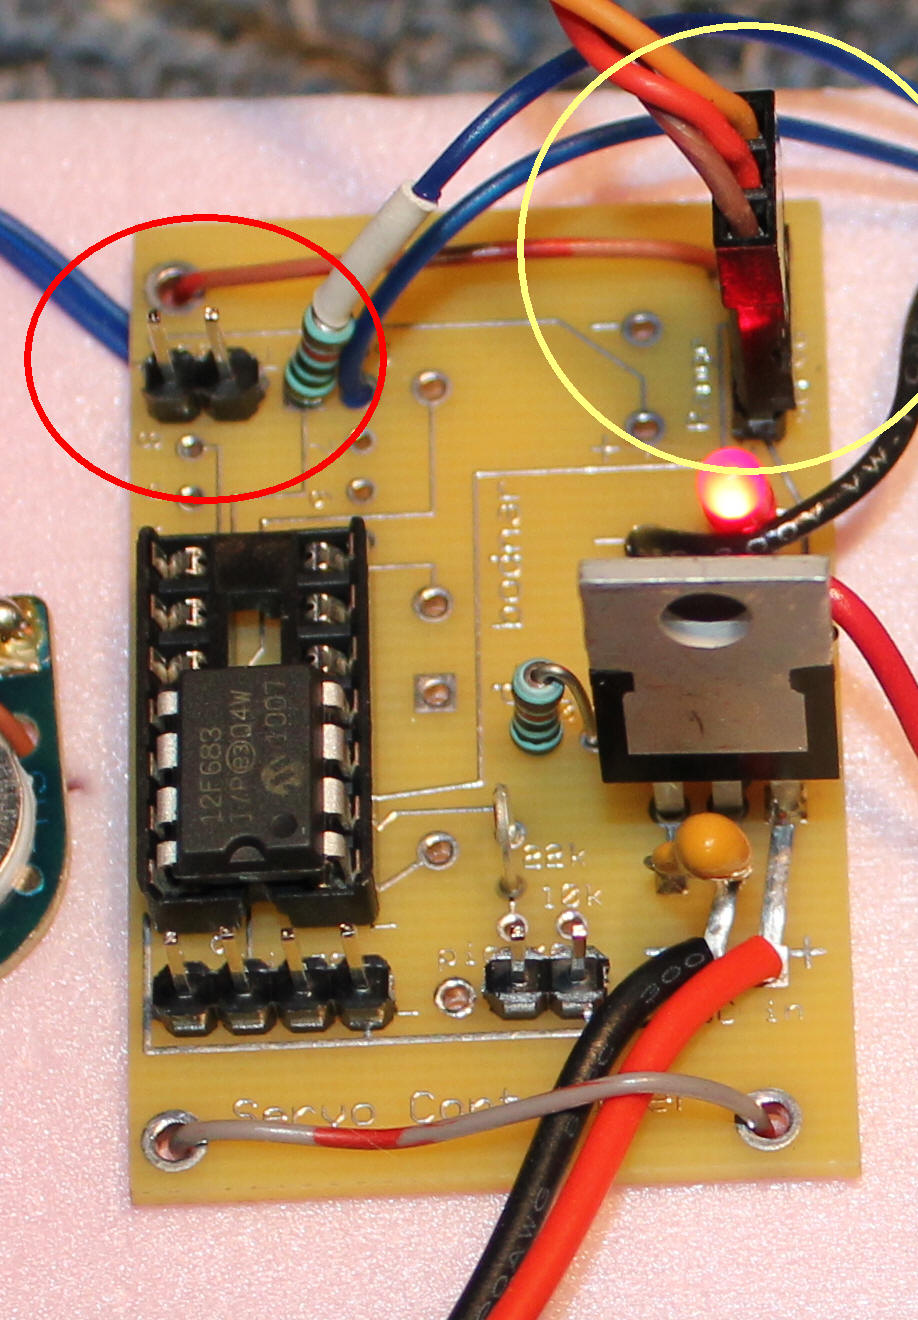
This close-up
shows the pins for the external switch (red circle) and the
connection for the servo (yellow circle) - orange wire at the top &
brown wire at the bottom.
 |
| SOFTWARE
The program for the animation is
written for a PIC 12F683 processor. It is programmed in PIC
Basic Pro - the listing is below.
'd. bodnar Elephant animation at CHP driver 4-28-09
' MP3 sound card (from Elect 123) triggers when the Audio output goes from
'   high to low  - keep it high for around 100 ms
' revised 8-16-10 to use pin 2 for serial out
' resised 8-18-10 for a single trumpet sound on UP and then a silent down - then reset
'Note2: GPIO.3 can't be connected to IR sensor while using ICSP
' @ DEVICE  MCLR_OFF
ansel = 0          'all inputs digital
cmcon0 = 7
INCLUDE "modedefs.bas"
DEFINE ADC_BITS 12
DEFINE ADC_CLOCK 3
DEFINE ADC_SAMPLEUS 50
ADCON0      =0              'analog
option_reg.7=0              'turn on weak pull ups
wpu         = %00001000     'weak pull ups on pin GPIO.3 only

Audio       VAR gpio.0      'pin 7
Trigger	    VAR gpio.3		'pin 4
ServoPin    VAR gpio.4		'pin 3
SerialOut   VAR gpio.5		'pin 2
Temp        VAR WORD
Temp2       VAR WORD
Range       VAR WORD
CWMin       VAR WORD
CCWMax      VAR WORD
Counter     VAR BYTE
DownFlag    VAR BIT
UpFlag      VAR BIT
CCWMax 	    = 300           '225 manual recommended max
CWMin 	    = 10            '75 manual recommended min
RangeMax    CON 170
CCW 	    VAR WORD	    'where to start rotation
CW 		    VAR WORD
CCW2        VAR WORD
Delay       CON 10

gpio        = %00001110        '1, 2, 3 inputs other outputs
DownFlag    = 0
UpFlag      = 0
CW= 90
CCW=240
CCW2=125

SEROUT SerialOut, n9600,[12,10,13,"Ver 1.0  Servo Control of Elephant",10,13]
SEROUT SerialOut, n9600,["(c) d. bodnar 08-18-10",10,13]


PAUSE 400
'high audio:pause 400:low audio:pause 1000
GOSUB DOWN
Start0:
SEROUT SerialOut, n9600,[10,13,"Waiting"]

StayHere:
SEROUT SerialOut, n9600,["."]
LOW ServoPin              'relax servo
IF Trigger = 0 THEN StayHere:

Start:
GOSUB UP:
PAUSE 1000
GOSUB DOWN
PAUSE 1000
GOTO Start0:

GOSUB UP:
PAUSE 1000
GOSUB DOWN
PAUSE 2000
GOSUB UP:
PAUSE 1000
GOSUB DOWN
PAUSE 5000
GOSUB UP:
PAUSE 1000
GOSUB DOWN
PAUSE 1000
GOSUB UP:
PAUSE 1000
GOSUB DOWN
PAUSE 16000
GOTO StayHere:


'move elephant trunk & head down
DOWN:
FOR Temp = CCW TO CW STEP -1
  PULSOUT ServoPin, Temp
  PAUSE Delay
NEXT Temp

'LOW Audio
RETURN


'move elephant trunk & head up
UP:
HIGH Audio:PAUSE 100:LOW Audio
PAUSE 500
FOR Temp=CW TO CCW STEP 1
  PULSOUT ServoPin, Temp
  PAUSE Delay
NEXT Temp
RETURN

'move elephant trunk & head down
DOWN2:
FOR Temp = CCW TO CW STEP -1
  PULSOUT ServoPin, Temp
  PAUSE Delay
NEXT Temp

LOW Audio
RETURN
PAUSE 1500

'move elephant trunk & head up
UP2:
'HIGH Audio:pause 100:low audio
FOR Temp=CW TO CCW2 STEP 1
  PULSOUT ServoPin, Temp
  PAUSE Delay
NEXT Temp
RETURN
'move elephant trunk & head up
UP3:
'HIGH Audio:pause 100:low audio
FOR Temp=CW TO CCW STEP 1
  PULSOUT ServoPin, Temp
  PAUSE Delay
NEXT Temp
RETURN
|