| Download JMRI Go to http://jmri.sourceforge.net/download/index.shtml and download version 4.2.1 - there is a newer test version that may work Once downloaded install JMRI. You may be prompted to update Java 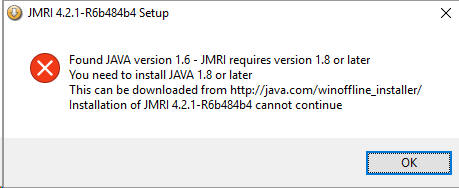 Go to the suggested site: http://java.com/winoffline_installer/ Be careful during install as it may ask you about setting Yahoo as your default search engine. After updating Java reinstall JMRI again. |
| Controller Connections The controller plugs into the computer via its USB connector (circled in green). Power goes to the receptacle circled in yellow. This should be 12 volts DC with the center pin of its plug positive. The only connections on the six pin header that you need for testing are the two labeled "T" for track. The two labeled "P" are for the programming track. The two on the right are for an additional, separate power supply should you want to use a higher voltage than the 12 volts supplied by the lower connection. If you do use an external supply it is a good idea to cut the trace on the bottom of the motor board labeled VIN (see:http://trainelectronics.com/DCC_Arduino/DCC++/ for more info)
|
| Plug in DCC++ Controller The computer should automatically install the appropriate drivers. This may take several minutes. If you would like to confirm that the controller was properly installed run Device Manager (see: http://www.softwareok.com/?seite=faq-Windows-8&faq=119 for Windows 8 & 10 or https://technet.microsoft.com/en-us/library/cc754081.aspx for Vista) You should see something like this in Device Manager under Ports (COM & LPT) - note the COM number - on mine it is COM3 - yours could be different.
|
| Run JMRI for the First Time Find JMRI in your programs list and click on Decoder Pro. The first time you run JMRI it will ask you to set up a controller.
After hitting Next select DCC++ from the first menu.
Next select DCC++ Serial Port...
Then select the COM port (same as what you saw in Device Manager).
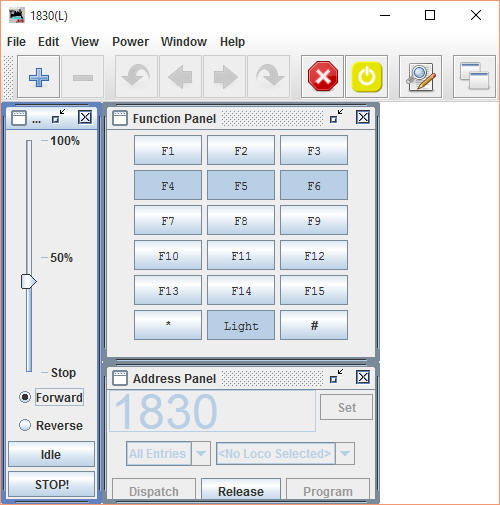
After setting these parameters JMRI will start. From the menu select DCC++ / Track Current Meter then Actions / Power Control and finally Actions / New Throttle. Your screen should look like this:
and the Throttle should look like this
Type in your loco's address (mine is 1830 as shown above) and turn the power on either with the Power Control window or by clicking Power at the top of the Throttle and selecting Power On. The slider to the left and the Forward and Reverse controls should control the locomotive. The number pad controls the functions.
|